
The short version
30-second read- Raid 4 opened on 20 October 2026. It needs While Guthix Sleeps; reach the Chasm of Tears with a games necklace and lit sapphire lantern, or a temple teleport.
- Five of eight bosses, same points. The Archive Guardian and Ocellus are fixed; pick one door from each of three pairs by gear, since no path raises unique chance.
- Deaths inside are not safe. HCIM and HCGIM lose their status on any death, and a wipe sends items to a gravestone, 75% cheaper until five completions.
- No drop rates or Practice Mode yet. The unique chest holds the Obligator, Ascension crossbows, Zorya's tome, Rondache and Horn of Bran, every rate still listed as Unknown.
The Short Answer
The Fractured Archive is Old School's fourth raid, the one most players just call Raid 4 (the wiki also lists Raids 4 and TFA). It came out on 20 October 2026 and opened at 11:00 UTC. The only requirement is While Guthix Sleeps, and the raid sits in the Chasm of Tears by the Ancient Guthixian Temple: take a games necklace to Tears of Guthix with a lit sapphire lantern, or read a Guthixian temple teleport.
Each raid is five bosses out of eight. The Archive Guardian always comes first and Ocellus always comes last, and in between you pick one of two doors three times. Every pair gives the same contribution points, so the choice is about your team, not your loot. The raid scales from 2 to 8 players, Jagex recommends 3 to 5, and a solo player is scaled as two.
Practice Mode was not out at release, no drop rate has been published for any unique, and a full team wipe sends everyone's unprotected items to a gravestone outside. Gravestone fees are 75% lower until you have five completions.
| Detail | Value |
|---|---|
| Released | 20 October 2026, opened at 11:00 UTC |
| Requirement | While Guthix Sleeps; The Fractured Archive miniquest starts at the lobby |
| Location | Chasm of Tears, near the entrance to the Ancient Guthixian Temple |
| Team size | 2–8 (3–5 recommended); a solo player is scaled as two |
| Bosses | 5 per raid out of 8: two fixed, three door choices |
| Official worlds | 404 (US east), 425 (UK), 566 (Australia) |
| Deaths | Unsafe for HCIM and HCGIM; a wipe sends items to a gravestone |
| Practice Mode | Not available yet |
| Drop rates | Not published for any unique |
Raid 4 Release Day: Opening Time, Worlds and Known Issues
The game update went out on 20 October 2026, but the raid stayed closed until Jagex had run last-minute tests and pushed a hotfix to open it at 11:00 UTC. After the hotfix, anyone with While Guthix Sleeps done is met by a messenger on login who hands over a note pointing to the raid; players who were already logged in could walk straight to the entrance. Players on world 345, the permanent Deadman world, cannot enter the raid at release.
Jagex says it does not plan quick balance changes after launch, though bug fixes will continue, and it is giving bronze, silver and gold medals to every member of the first three teams to clear. The same update cut Nex's Crush defence from +60 to +35 so the Obligator performs well there; our Nex guide covers the rest of that fight.
Known issues Jagex listed at launch
| Issue | What to do | Status |
|---|---|---|
| The Jeweller's chisel does not work on Ascension shards | Use a regular chisel to make Ascension bolts | Fix planned, no date |
| Ultimate Ironmen with items stored at Pete Kayer cannot enter | Reclaim the stored items first; an in-game message explains this | Listed as a note |
| Mystic Vigour and Deadeye seem not to activate | Turn off RuneLite's Instant Inventory plugin, which may make active prayers look inactive | Workaround given |
| Graphical issues on the mobile and C++ clients | Nothing for players to change yet | Under investigation |
| Some global stat counters on the lobby scoreboard show wrong values | Personal stats and global times display correctly | Fix aimed for the following week |
| Araxxor's final-phase stepunder is broken (outside the raid) | Adjust your movement in that phase for now | Fix held until at least the following week, because a rushed change could affect Archive NPCs |
What The Fractured Archive Actually Is
Followers of Guthix built the Archive at the bottom of the Chasm of Tears to store his knowledge and items, then stopped work on it and left a guardian inside. Lucien taking the Stone of Jas during While Guthix Sleeps opened the entrance, and agents of several gods have since moved in to loot it. You fight for the alliance of the Temple Knights, the Guardians of Armadyl and Crux Eqal, which General Montoya leads at the Archive.
Jagex billed it as the "toughest raid yet", and the wiki describes it as heavily combat-focused with minimal skilling or puzzle elements, so expect boss after boss rather than the puzzle and skilling rooms of Chambers of Xeric. Jagex's pre-release blog said it was built as group content first, with rooms that give different players separate jobs, which is why 3 to 5 is the recommended size.
Still deciding which raid to learn first? Our raids overview helps you choose, and the Theatre of Blood guide is the closest match for how wipes work here.
How to Get to the Fractured Archive: Requirements and Route
Requirements
The raid needs While Guthix Sleeps and nothing else. The first time you try to enter the lobby, The Fractured Archive miniquest starts. The wiki lists it as Grandmaster difficulty and Medium length and recommends combat level 110, and you complete it by beating every boss in one raid: the Archive Guardian, Ezekiel or Bork and the Smorks, Moia or Dreadnoth, Xarth or the Dagon'hai, then Ocellus.
There are no skill requirements beyond the quest chain; the levels the wiki's strategy page suggests are in the stats and gear section below. If the quest chain is what holds you back, see our quests page.
Route to the lobby
- 1
Teleport to Tears of Guthix with a games necklace.
- 2
Carry a lit sapphire lantern so one of the light creatures takes you down into the Chasm of Tears.
- 3
Crawl through the opening to the south-west to reach the raid lobby.
Faster ways in: a Guthixian temple teleport scroll lands you close to the entrance. It is tradeable and stackable, needs While Guthix Sleeps, and drops from Tormented Demons at 1/12 in stacks of 2, so check your bank. Once you have an Archivist's folio from the raid, each Ascension shard charges it for 5 teleports straight to the lobby. You can also run in from the Lumbridge Swamp Caves.
Worlds and first login
The official raid worlds are 404 (US east), 425 (UK) and 566 (Australia). The entrance is on a cliff face near the entrance to the Guthixian Temple, and with the quest done a messenger hands you a note pointing there when you log in.
Lobby Guide: Bank, Grouping, Strategy, Ascension Rocks
The lobby has a bank, a leaderboard, the Grouping Board, the Strategy Board and a mine of Ascension rocks. You will also find General Montoya, a banker, the Record Keeper, the Wizard apprentice, druids, Temple Knights and alliance builders.
- 1
Grouping Board (east side):
create a party here. The grouping interface has a toggle to allow or block spectators.
- 2
Strategy Board (west side):
spectate other groups. Jagex's pre-release blog adds that you can look up a specific party or a recent one, unless they turned spectators off.
- 3
Leaderboard:
some global stat counters showed wrong values at launch; personal stats and global times are correct.
- 4
Record Keeper:
manages the alliance records. Jagex hinted he may help with unlocking Zeal from the Horn of Bran.
- 5
Loot Wheelbarrow:
appears when you left rewards unclaimed after your last raid.
Ascension rocks
Ascension rocks, south-west of the lobby, give you something useful to do while the team gathers. The numbers below are from the Ascension rocks page.
| Detail | Value |
|---|---|
| Mining level | 80 |
| XP per shard | 15 |
| Active rocks | 3 at a time; they deplete every 295 ticks (177 seconds) and three others become active |
| Expected rate | About 130 shards and 5,500 Mining XP an hour at 99 Mining with a dragon pickaxe |
| Sprites | Appear while you mine and give up to 2 bonus shards; they vanish after 30 seconds if ignored |
| Limits | No tick manipulation and no extra-resource effects; a crystal pickaxe uses charges |
Keep the shards. One shard makes 10 Ascension bolts at 86 Fletching for 140 XP, charges the Archivist's folio for 5 teleports, and with 20 nature and 20 death runes adds 10 charges to the Obligator. The wiki puts fletching everything you mine at about 18,000 Fletching XP an hour. Use a regular chisel for now, since the Jeweller's chisel does not work on shards.
Team Size and Scaling (2–8, Recommend 3–5)
| Team size | What Jagex and the wiki say | Practical read |
|---|---|---|
| 3–5 | Jagex's recommended size, the scales it found most enjoyable in testing | Default for first clears |
| 2 | The lowest scale. Jagex's pre-release blog called duo clears tough but manageable once you know the fights | A goal once both players know every room |
| 1 | You can enter alone, but boss hitpoints are scaled as if two players were there. The pre-release blog called solo clears very challenging, closer to soloing Theatre of Blood than Chambers of Xeric | A long-term challenge, not a way to learn |
| 6–8 | Supported, with boss hitpoints scaling to the number of players. The pre-release blog warned that big teams can leave players feeling less needed | Works for clan runs, with less for each player to do |
Two fights pick their target by who walks in first: the first player into Ezekiel's room is marked as the tank until they die, and Bork chases the first player who enters his arena. Decide who that is before you open the door.
Want help getting a learner team through? See paying for OSRS PvM coaching and hiring someone for OSRS raids.
Raid Layout: Five of Eight Bosses and the Door Choices
The Fractured Archive is a pseudo-linear raid. You always fight the Archive Guardian first, in the atrium. After it dies you pick one of two side doors, and after each boss you come back to the central room to pick the next one. Ocellus, the hooded figure from the preview blogs, is always last, so three of the eight bosses are skipped in every raid.
| Order | Option A | Option B |
|---|---|---|
| 1st | Archive Guardian | None, always fought |
| 2nd | Ezekiel | Bork and the Smorks |
| 3rd | Moia | Dreadnoth the Jellied |
| After the 3rd | The Quartermaster arrives with supplies | None |
| 4th | Xarth | Dagon'hai Elder and Monks |
| 5th | Ocellus | None, always fought |
Jagex's launch post confirms every pair gives the same total contribution points, so no path raises your unique chance for a completion. Its pre-release blog added that each pair is balanced to a similar difficulty and that every boss will get its own Combat Achievements eventually, so completionists will fight all eight.
Fractured Archive Bosses: Stats and Mechanics
The stats below are from each boss's wiki infobox, and the wiki does not say which team size they are for. The mechanics come from the player-written strategy page and the boss pages a day after release, so treat them as observations that will be refined.
| Boss | Combat | Listed HP | Weakness | Defence notes |
|---|---|---|---|---|
| Archive Guardian | 984 | 550, behind a shield bar | Fire 80% | Crush +20; immune to poison, freezes and Ancient Magicks |
| Ezekiel | 984 | 3,000 | Earth 25% | Ranged +445 / +370 / +320 (light / standard / heavy) |
| Bork | 871 | 1,500 | Earth 40% | Crush +10, heavy ranged +5; 10 flat armour (0 while stunned) |
| The Smorks | 640 | 600 | Earth 85% | Magic +400; 2 flat armour |
| Moia | 1,064 | 785 | Air 80% | Stab +20, Crush +15 |
| Dreadnoth the Jellied | 888 | 2,100 | Fire 85% | Melee +15 / +20 / +5; 40% freeze resistance; Demon |
| Xarth | 912 | 2,600 | Water 85% | Crush +20; Demon, so demonbane works |
| Dagon'hai Elder and Monks | 427 each | Not listed | Not listed | No other stats on the wiki yet |
| Ocellus | 1,121 (phase 1), 1,601 (phase 3) | 2,500 (phase 1), 5,250 (phase 3) | None | Demon; immune to poison and cannons |
Archive Guardian (always first)
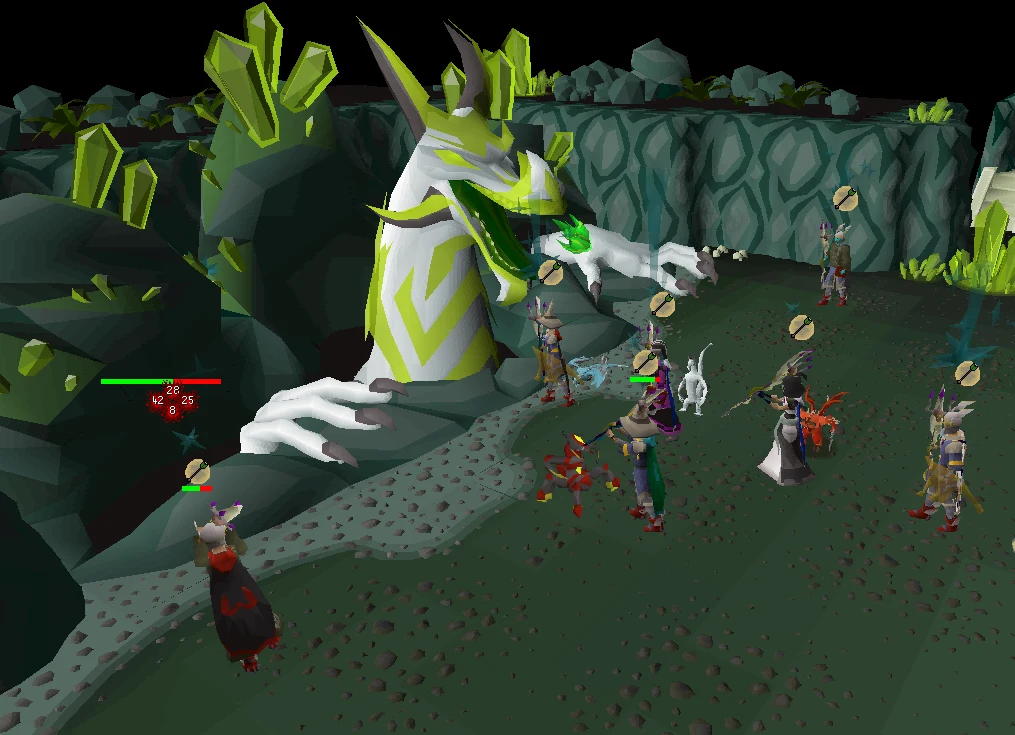
The Guardian starts in the air behind a shield bar, and while it flies only ranged, magic and halberds can hit it. Break the shield and it crashes down to be meleed. Mushroom spores around it hit for 3–10 and poison, and while it is grounded, tendrils spawn on the side of you away from the boss and sweep a 3x3 area. Four inert guardians around the room can be charged by attacking them; players measured each charge at about 40% of the shield.
Below 33% it starts a laser on one player, announced with "The Archive Guardian stares intently at...". It can kill, but the damage is shared among players standing in line with the target, so line up with whoever it picks.
Ezekiel (second boss, option A)
The first player into the room is the tank. His attacks cleave almost all the way round him and leave a safe spot directly behind, so everyone else stands opposite the tank. After every two auto-attacks he casts an area lightning attack you dodge by moving at least two tiles, and spawns four flying swords.
The swords fly in a straight line once they finish charging, and if they miss him he heals. Hitting a sword staggers it and charges its damage, so a charged sword that lands damages and stuns him instead. The swords resist ranged and are very weak to air magic. Players also report a mechanic that caps damage on Ezekiel at single digits, much like Verzik Vitur's first phase. In the enrage, lightning strikes in volleys of three that show you which way to dodge.
Bork and the Smorks (second boss, option B)
Bork chases the first player in and attacks with melee shockwaves timed to the drum on his stomach, while the Smorks sit in the middle firing ranged and magic and lobbing cannonballs. A heavy cannonball that lands on Bork stuns him, and incendiary ones leave burning oil. Whichever half survives enrages: kill Bork first, because the enraged Smorks are easier to handle than Bork stomping across the whole arena.
Moia (third boss, option A)
Moia is Lucien's half-Mahjarrat daughter, and her wiki write-up is still thin. Players report zombies moving in fixed patterns inside a ring (they respawn, and the Venator bow handles them well), a "cough" mechanic, and a ranged attack just before a blue special that you pray Magic against. She has 785 listed HP and an 80% air weakness.
Dreadnoth the Jellied (third boss, option B)
Dreadnoth walks slowly after the team and melees anyone in reach, so keep moving. He can be frozen, but with 40% freeze resistance it takes repeated freezes. At three health thresholds he slams (pray Melee) and then fires ranged shots (pray Ranged), adding a slam each time, and spawns jellies that drain prayer even through Protect from Melee. Kill them fast with Ice Barrage, Blood Barrage or the Venator bow; big teams should stack so one barrage catches them all.
In the enrage he slams a random player for heavy damage and heals if it lands. Blood left on the floor does about 8 damage when stepped on, and he drops around 10 jellies when he dies.
Xarth (fourth boss, option A)
In phase 1, attack from range while standing behind the pillars; the strategy page names Water Surge and the Twisted bow as effective. When he charges his blast, the whole team hides behind the same pillar so the pillars are not used up early, and watch which way he faces, because a badly placed team can cost two pillars in one blast. Phase 2 starts when all three pillars are gone: he uses melee and ranged, sets burning tiles, and raises corpses that walk to him and heal him.
Phase 2 is mostly about handling the corpses. Water and ice spells kill them in one hit, freezes stop them, and fire spells spawn more. If they heal him for 200 in total he blasts the whole arena; standing behind the tank reduces that blast.
Dagon'hai Elder and Monks (fourth boss, option B)
Combat 427 each and 2x2, with no other stats on the wiki yet. The only mechanic written up so far is a shared shield pool at the start of the fight, so until the pages fill in, this is the door with the least published help.
Ocellus (always last)
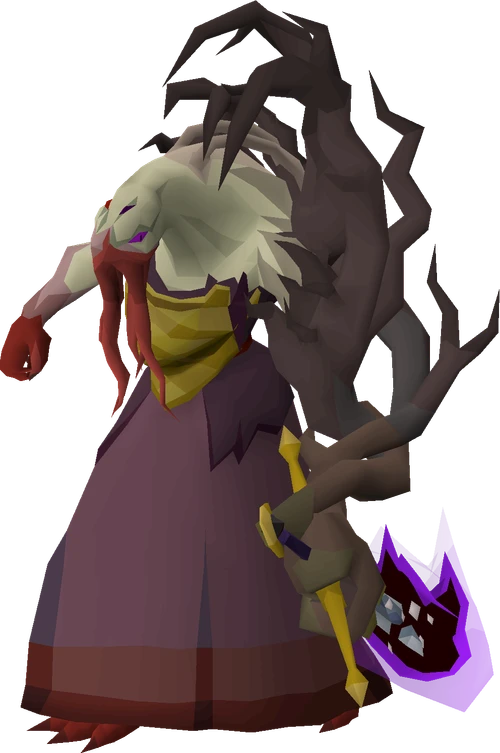
Ocellus, a Guardian of Guthix trying to make himself a god, is fought in phases. In phase 1 he moves between the corners firing ranged and magic and spreads tendrils and cracks across the floor. Standing on them costs a little HP but stops him healing and slows his charge; if the charge fills, "Embrace... annihilation..." hits everyone for 80 or more. Phase 2 splits the room with portals: stand where the orange portals cross, then step on the orange floor portal to jump quadrants.
In phase 3 he takes up the Blade, breaks the arena into four quadrants joined by stepping stones, and destroys one at a time after shouting "Obliteration...", which kills anyone who has not jumped clear. Void Vines root a player until a teammate breaks them, Void Rifts empower whoever kills them, and four censers around the room give buffs. On the last quadrant he switches to Ancient Curses: Deflect Melee, Deflect Range and Soul Split. Defence reduction works in every phase.
Which Door to Pick Before Ocellus
Every pair is worth the same points, so pick on what your team brings and what it has already learned. The wiki stats and strategy notes point this way:
| Choice | Pick this side if | Pick the other side if |
|---|---|---|
| 2nd: Ezekiel or Bork and the Smorks | Bork and the Smorks: your team leans melee or heavy ranged. Bork's Crush defence is +10 and his heavy ranged defence +5, and the pair's listed HP (1,500 plus 600) is below Ezekiel's 3,000 | Ezekiel: you bring strong magic. He is 25% weak to earth, his ranged defence is the highest of any boss with listed stats, and someone needs air spells for the swords |
| 3rd: Moia or Dreadnoth | Dreadnoth: you have barrage or a Venator bow for the jellies and fire spells for his 85% weakness; his fight is the better documented of the two | Moia: you want the smaller HP pool (785) and have air spells for her 80% weakness, and you accept that her mechanics are barely written up |
| 4th: Xarth or the Dagon'hai | Xarth: you have water and ice spells for the corpses, demonbane, and a team that can share one pillar | Dagon'hai Elder and Monks: you would rather learn a fight with almost no published notes than handle Xarth's corpses |
On what is published a day after release, a sensible first route is Bork and the Smorks (or Ezekiel for a magic-heavy team), then Dreadnoth, then Xarth: the fights with the clearest notes and weaknesses to plan around. Change route once you have a reason to, since Jagex's pre-release blog expects the choice to change completions per hour depending on team size and gear.
Stats and Gear the Wiki Suggests
Raid 4 has no skill requirement beyond the quest, but the wiki's strategy page suggests 90+ Hitpoints, Attack, Strength, Defence and Ranged, and 96+ Magic. Its recommended equipment tables, ordered from most to least effective, put these at the top:
| Style | Weapons | Armour and extras |
|---|---|---|
| Melee | Scythe of Vitur or Soulreaper axe; then Noxious halberd; then Abyssal bludgeon or Ursine chainmace | Torva, Amulet of rancour, Infernal cape, Avernic defender, Ferocious gloves, Avernic treads (max), Ultor ring |
| Ranged | Twisted bow with Toxic blowpipe and Venator bow; then Zaryte crossbow or Bow of Faerdhinen; Zaryte crossbow for specs | Masori (f), Necklace of rupture, Dizana's quiver, Zaryte vambraces, Avernic treads (max), Venator ring |
| Magic | Tumeken's shadow; Eldritch Nightmare staff and Eye of Ayak for specs | Ancestral, Occult necklace, Imbued god cape, Elidinis' ward (f), Confliction gauntlets, Avernic treads (max), Magus ring or Lightbearer |
Several picks on that list come straight from the fights. A halberd is the melee weapon that hits the flying Archive Guardian, and the Venator bow clears Moia's zombies and Dreadnoth's jellies. Most bosses have an elemental weakness, so bring runes for all four elements: fire for the Guardian and Dreadnoth, earth for Ezekiel, Bork and the Smorks, air for Moia and Ezekiel's swords, water for Xarth and his corpses. Xarth, Dreadnoth and Ocellus all carry the Demon attribute.
If the account is short of that gear, our boss gear progression guide sets out the upgrade order.
Resupplies: The Quartermaster and Alliance Supplies
After the third boss, the Quartermaster arrives in the atrium and runs the Alliance Supplies shop, which sells for Supply Credits earned during the raid. The wiki lists the stock but not the credit prices or how credits are earned.
| Item | Stock |
|---|---|
| Alliance log | 1 |
| Leftovers | 1 |
| Saradomin brew(4) | 6 |
| Super restore(4) | 4 |
| Prayer potion(4) | 4 |
| Prayer potion(2) | 1 |
| Ranging potion(2) | 1 |
| Super combat potion(2) | 1 |
| Manta ray | 10 |
| Halibut | 5 |
| Giant krill | 10 |
Until the Quartermaster turns up, you live on what you brought in. Jagex's pre-release blog adds three rules to plan around: the resupply is points-based and your performance up to that point affects it, there is no Overload or equivalent in the raid, and you cannot bank or deposit supplies once inside. The Alliance log in the shop is an untradeable, unbankable note that records your progress through the raid.
Deaths, Wipes, Gravestones and Spectating
Hardcore status
Deaths in the Fractured Archive are not safe deaths. HCIM and HCGIM accounts lose hardcore status on a death inside the raid, and that means any death, not only a full wipe. If you want to keep the status, watch other teams from the Strategy Board until you know the fights before you set foot in a room.
What a wipe costs
- If the whole team dies, everyone is removed from the raid and a gravestone is placed outside the entrance.
- All unprotected items go to that gravestone. Reclaiming them costs up to 500,000 coins, the same as a normal death.
- Gravestone fees are 75% lower until you have at least five completions.
- Items left on the ground are always lost.
Jagex first said that in the weeks after release a death would not wipe the whole raid, and teams would get some supplies to try the fight again, like the death runs in Tombs of Amascut. It has since dropped that plan and is keeping Theatre of Blood style wipes. Its pre-release blog also mentioned backup wipe systems with severe penalties to unique chance and supplies, kept in reserve if needed.
Spectating
Dead teammates and outside spectators can click the party orbs to see any player's view while the team keeps fighting, and if you are in the same party as the player you are watching, you can ping their inventory slots. A toggle on the grouping interface lets a group block spectators. Watching other groups from the Strategy Board, unless they turned spectators off, is the cheapest way to learn a boss before you risk a gravestone.
Practice Mode: Not Out Yet
Practice Mode was not available at release, and Jagex will give a full rundown when it launches; no date has been given. Jagex's pre-release blog said it was held back so everyone had the same experience while racing for the early clears. The plan on the raid page:
- Bosses are fought at full strength, not scaled down like Theatre of Blood's Entry Mode.
- You can choose which phase the boss starts in.
- You can only practise a boss or phase you have already reached in a real raid.
- Supplies are refunded and friends can join.
So it will not let you rehearse Ocellus before you reach him. Until it arrives, the Strategy Board is your practice tool.
Raid 4 Rewards: What the Fractured Archive Chest Drops
When Ocellus dies, the Blade takes the team to a reward room. Eight standard chests stand around the edge and you can open only your own, the one that sparkles. If anyone earned a unique, a special chest appears on a raised platform to the north and gives one item. Loot can be banked, taken or destroyed, and anything you leave goes to the Loot Wheelbarrow in the lobby. Players who perform poorly get only a cabbage; the wiki has not pinned down the condition.
| Reward | What it does | Tradeable |
|---|---|---|
| Obligator | The megarare: a two-handed Crush weapon for 85 Attack (+120 Crush, +40 Strength) that rolls damage up to four times depending on the target's Crush weakness and hits 2x2 targets 20% and 3x3 or larger 40% harder | Only when fully uncharged |
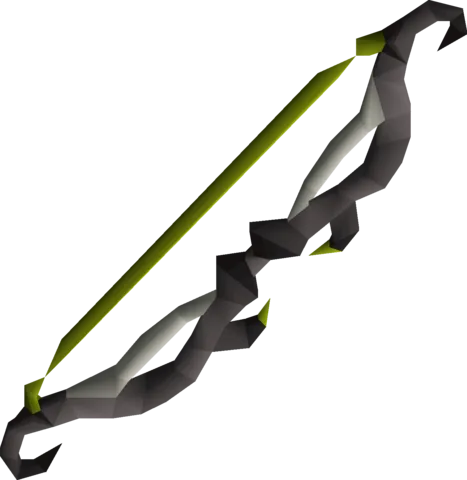
| Ascension crossbows | Dual-wield crossbows for 80 Ranged that fire every 2 ticks on Rapid at 6 tiles, using only Ascension bolts; Jagex calls them a raid-tier upgrade to the Toxic blowpipe | Yes |
| Zorya's tome | A two-handed book that works as a powered staff for 85 Magic (3 ticks, base max hit 18); its special adds 150% accuracy and 60% damage and, if it hits, gives the next three casts the same boost at 2 ticks | Only when fully uncharged |
| Rondache | An 80 Defence shield that cuts incoming melee, ranged and magic damage by 2 and stores it as charge for an instant Shield Bash | Yes |
| Horn of Bran | Unlocks the Zeal prayer, a Piety upgrade for 84 Prayer, 75 Attack and 75 Strength giving +25% Attack, +28% Strength and +25% Defence; the unlock steps are not documented yet | Yes |
| Elemental fragments | Four fragments, each adding +2 to the base max hit of one element's spells permanently, with duplicate protection | No |
| Archivist's folio | Teleports you to the lobby; 1 Ascension shard gives 5 teleports | No |
| Orion | The raid pet, with a robed variant | No |
| Living record capes | Cosmetic capes at 100, 500, 1,000, 1,500 and 2,000 completions | No |
| Ascension shards | 75–78 per standard-loot roll; used for bolts, folio teleports and Obligator charges | Yes |
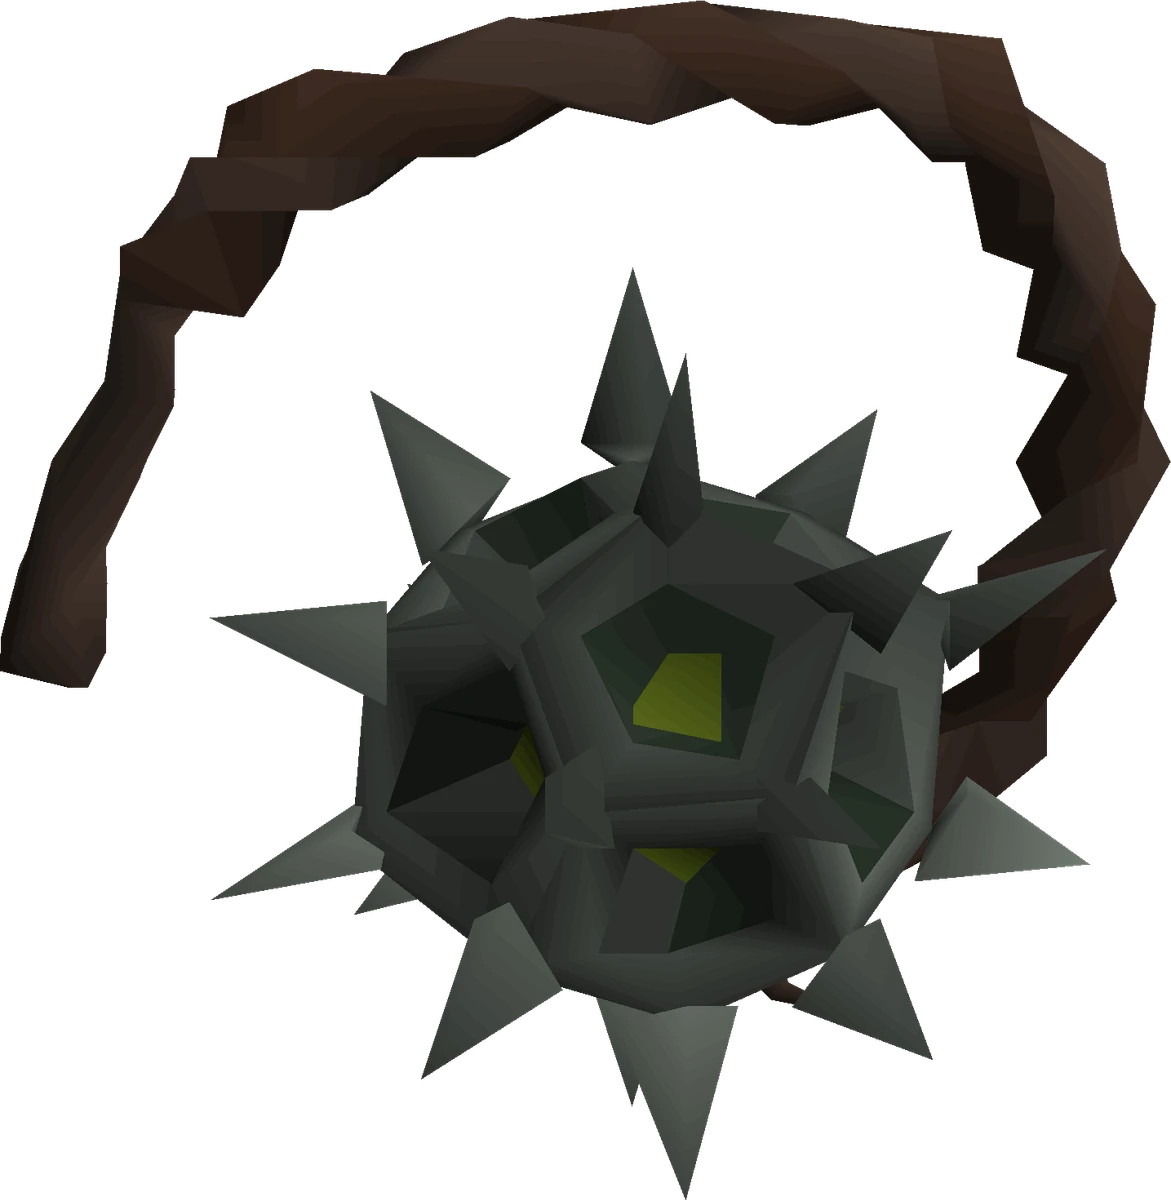
No drop rate has been published for any of these: the wiki lists every unique as Unknown, and the quantities in its standard-loot table, which is rolled three times per chest, come from 174 samples in the wiki's drop rate project so far. For full stats, charging costs and what each item replaces, read our Raid 4 rewards guide.
Before Your First Raid 4 Attempt: A Checklist
- 1
Finish While Guthix Sleeps, then walk to the lobby entrance to start The Fractured Archive miniquest.
- 2
Stock the route: a games necklace and a lit sapphire lantern, or Guthixian temple teleports.
Once you have an Archivist's folio, charge it with shards at 5 teleports each.
- 3
On an Ultimate Ironman, reclaim anything stored with Pete Kayer first.
- 4
Settle a team of 3–5, agree who walks into Ezekiel's or Bork's room first, and pick all three doors before you leave the lobby.
- 5
Bring runes for every element:
fire, earth, air and water each have at least one boss that is 80% or more weak to them.
- 6
Pack supplies for the first three bosses, since the Quartermaster only arrives after the third and Jagex's pre-release blog says there is no Overload and no banking inside. Budget for a wipe too: up to 500,000 coins to reclaim, 75% less until five completions.
- 7
If Mystic Vigour or Deadeye look switched off on RuneLite, turn off the Instant Inventory plugin.
Common Mistakes
- 1
Treating the raid as safe on a hardcore.
Any death inside ends HCIM or HCGIM status, wipe or not.
- 2
Fletching bolts with a Jeweller's chisel.
It does not work on Ascension shards at launch; use a regular chisel.
- 3
Casting fire spells at Xarth's corpses.
Fire spawns more of them, while water and ice spells kill them in one hit, and 200 healing on Xarth triggers an arena-wide blast.
- 4
Killing the Smorks before Bork.
Bork's stomps then cover the whole arena; the wiki recommends Bork first.
- 5
Picking doors for loot.
Every pair gives the same contribution points, so pick on gear and comfort.
Where Paid Help Fits
If you would rather have completions on your account than spend your own gravestones learning eight bosses, our Raid 4 service has a player from the team run The Fractured Archive on your account by hand. It is listed but not priced yet, so ask on live chat or Discord for a quote. Hardcore accounts should say so first, because a death in the raid ends the status whoever is playing.
FAQ
Is Raid 4 out in OSRS?
Yes. The Fractured Archive, Raid 4, came out on 20 October 2026 and opened at 11:00 UTC through a hotfix after Jagex's last checks. Players on world 345, the permanent Deadman world, could not enter at release.
Can a Hardcore Ironman do the Fractured Archive?
You can enter, but no death inside is safe. HCIM and HCGIM accounts lose hardcore status on any death in the raid, not only on a team wipe. Jagex's launch post warned that anyone going in blind on release will die, so learn the fights by spectating first if the status matters to you.
How many players do you need for the Fractured Archive?
It scales from 2 to 8 and Jagex recommends 3 to 5. You can enter alone, but the bosses' hitpoints are scaled as if two players were there, and Jagex's pre-release blog called solo clears very challenging.
What are the requirements for the Fractured Archive?
Only While Guthix Sleeps. The Fractured Archive miniquest starts when you first try to enter the lobby and is completed once you beat every boss in one raid. The wiki's strategy page suggests 90+ in the combat skills and 96+ Magic, but those are player suggestions, not gates.
What are the Fractured Archive rewards and drop rates?
The unique chest can give the Obligator, Ascension crossbows, Zorya's tome, the Rondache and the Horn of Bran, which unlocks the Zeal prayer. Orion the pet, four elemental fragments, the Archivist's folio, Ascension shards and five Living record capes complete the collection log. No drop rate has been published for any of them; a line about rates arriving in week 2 sat among joke quotes in the pre-release blog and is not a date.
Does the door you pick change your loot?
No. Jagex's launch post says every pair gives the same total contribution points, so no path raises your unique chance for a given completion. The choice changes how hard and how fast the raid is for your team, which matters for completions per hour.
Is Practice Mode out for Raid 4?
Not yet. It was not available at release and Jagex has not given a date. When it arrives you will fight bosses at full strength, pick the starting phase, have supplies refunded and bring friends, but only for bosses and phases you have already reached in a real raid.
Still stuck on a mechanic? Ask the team on our Discord, it is free.
Bottom Line
Raid 4 is live: finish While Guthix Sleeps, get to the Chasm of Tears with a games necklace and a lit sapphire lantern or a temple teleport, and bring a team of 3 to 5. Pick doors on your gear rather than loot, since every pair pays the same points, and plan for no Practice Mode, no published drop rates and full-wipe gravestones that cost 75% less for your first five completions. On a hardcore account, remember that no death in there is safe.
Sources
Numbers and mechanics on this page come from these 29 OSRS Wiki pages:
- Update:The Fractured Archive - Out Today
- The Fractured Archive
- The Fractured Archive (miniquest)
- Guthixian temple teleport
- Ascension rocks
- Ascension bolts
- The Fractured Archive/Strategies
- Archive Guardian
- Ezekiel
- Bork
- The Smorks
- Moia
- Dreadnoth the Jellied
- Xarth
- Dagon'hai Elder
- Ocellus
- Alliance Supplies
- Chest (The Fractured Archive)
- Obligator
- Ascension crossbows
- Zorya's tome
- Rondache
- Horn of Bran
- Zeal
- Elemental fragments
- Archivist's folio
- Orion
- Ascension shards
- Update:The Fractured Archive - Everything You Need To Know
Enjoyed the guide?
Drop a like — it helps other Adventurers find the good stuff.
Community
Comments
Silence in the hall…
Be the first Adventurer to leave a mark.
Join the thread
Add a comment
Tips, drops, or “this carried my account” — keep it useful.