
The short version
30-second read- Keep your health above 60 at all times. A punch and a sergeant hit landing together can reach that total.
- Switch to Protect from Magic when he dies. All three sergeants converge on one player, and more Bandos deaths happen in those ten seconds than mid-kill.
- Wait for the tank's first hit before attacking. Damaging Graardor earlier hands him to you while you are wearing attacker gear.
- Bring bones to peaches tablets. Graardor and all three sergeants drop bones, so each full clear turns into 32 hitpoints of free healing.
Why People Fight General Graardor
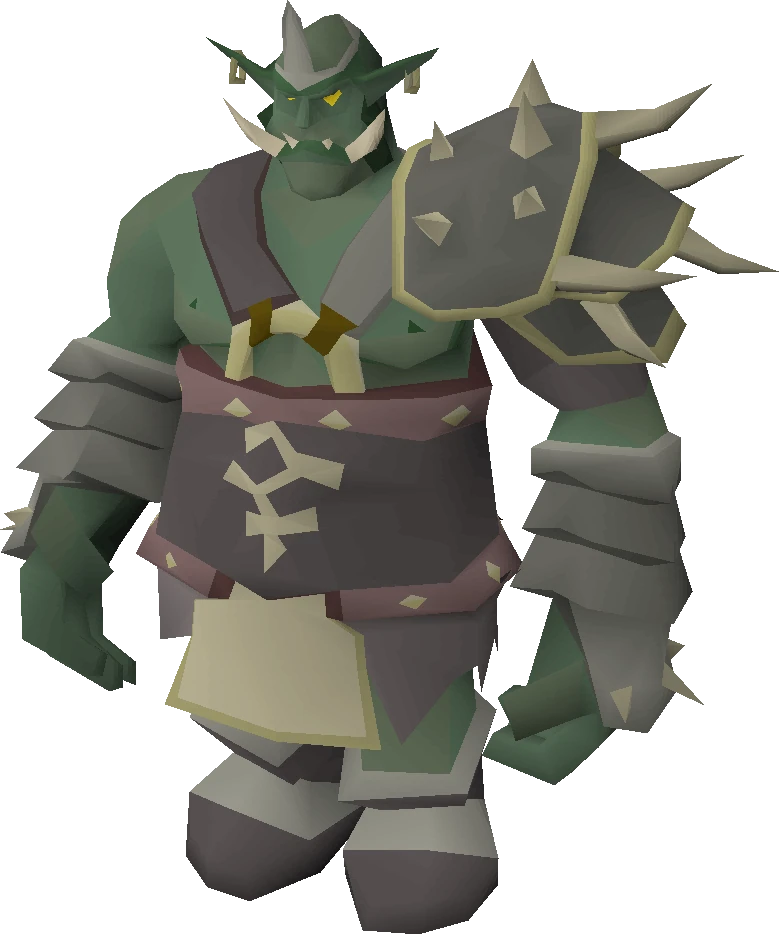
General Graardor is the Bandos general in the God Wars Dungeon: level 624, 255 hitpoints, a melee punch that hits up to 60 and a ranged ground slam that hits up to 35 on every player in the room. To fight him you need 70 Strength and a hammer for the Bandos' Stronghold door, then 40 Bandos follower kills or an ecumenical key for his room. He drops the Bandos chestplate, tassets and boots at 1/381 each and the bandos hilt at 1/508.
He is the general most players meet first, since nothing on the way to him needs a grandmaster quest or a skill you were avoiding. Bandos' Stronghold is where a mid-level account finds out what a 60 max hit feels like.
What you are here for is the Bandos chestplate and tassets, which is an unusual reward identity among the generals because you will very likely keep wearing them rather than selling them. Look at almost any melee tank setup in this dungeon, including the ones recommended for the other three generals, and Bandos armour is sitting in the second or third row of the table. The bandos hilt is the lottery ticket on top. The armour is the thing that quietly changes what the rest of your account can do.
Mechanically he is the crudest of the four, and that is a compliment in a fight this dangerous. Two attacks in three are a punch that can take 60 off you, one in three is a ground slam that reaches every player in the chamber, and three goblin sergeants pick a target based on a rule you can read and exploit. There is no counter to memorise and no phase change. The difficulty is entirely in whether you can hold a prayer, keep your health high enough that no two things can add up to a death, and stop yourself from stealing the sergeants off your tank.
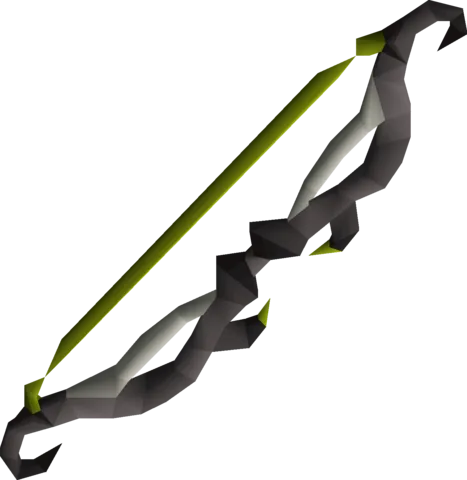
He also has the best-documented no-damage method of the four generals. The altar-door route turns Graardor into a shooting drill where you never take a hit, and it is the reason a solo player with a bow of Faerdhinen has a completely different experience of this boss to a solo player with a whip.
| Field | Detail |
|---|---|
| Classification | GWD general (Bandos) (Boss) |
| Group | God Wars Dungeon |
| Difficulty | 3 / 5 |
| Solo or team | Solo or team |
| Access requirement | 70 Strength and a hammer, then 40 Bandos kills or an ecumenical key |
| Notable reward | Bandos chestplate and tassets, bandos hilt |
| Signature mechanic | Solo Bandos methods |
| Hitpoints | 255 |
| Max hits | 60 (melee), 35 (ranged) |
| Released | 17 October 2013 |
Is General Graardor the Right Fight for You Yet?
Graardor rewards defensive levels far more than offensive ones. The fight has no damage check in it, so a slow kill is only a slow kill, whereas a soft armour set turns every shockwave into a real chunk of your health bar. That is why the wiki's suggested skills push Hitpoints and Defence hard and treat Strength as almost incidental beyond the door requirement.
You are ready for this fight if:
- You have 70 Strength. It is a hard gate on Bandos' Stronghold and it cannot be boosted, so no summer pie or dragon battleaxe is getting you through that door.
- You have at least 43 Prayer for the protection prayers, and ideally 44 for Eagle Eye if you plan to range him.
- You own either a ranged body for the magic defence against Steelwill, or a full justiciar set. Fighting him without one of those is what turns a manageable trip into a supply drain.
- You can hold Protect from Melee for an entire kill without dropping it to check something. His punch through no prayer is a 60.
- You have a rope for the first trip into the dungeon, and a hammer for the door unless you are carrying an elder maul or a dragon warhammer.
Come back later if any of these are true:
- Your only plan is melee with mid-tier gear. The strategy page is unusually blunt about this: downgrades hit hard enough that a solo melee trip without prayer flicking can be a single kill.
- You cannot reliably keep your health above 60. 60 is the threshold that stops a punch and a sergeant's hit combining into a death.
- You want to range him but have not learned a kiting method yet. Ranged armour has terrible ranged defence, and standing still in it while he slams the floor is the worst of both approaches.
Access Requirements
Everything between you and Graardor, in the order you hit it:
- Into the God Wars Dungeon: Troll Stronghold done up to beating Dad, or the Easy Combat Achievement tier, which gives you Ghommal's hilt 1 and three daily teleports to the dungeon entrance. You also need 60 Strength or 60 Agility to get past the boulder, and a rope the first time you climb down.
- Into Bandos' Stronghold: 70 Strength, which cannot be boosted, and a hammer to bang the door. An elder maul or dragon warhammer does the same job.
- Into his room: 40 kills of Bandos followers. The in-game counter calls this essence now. It drops to 35, 30, 25 and 15 once you finish the Hard, Elite, Master and Grandmaster Combat Achievement tiers, and it resets when you leave the dungeon.
- Or skip the count with an ecumenical key. You can hold three, four with the Medium Wilderness Diary and five with the Hard one.
From the Hard tier up you can also rent a private instance of his room for 150,000 coins, which drops to 125,000, 100,000 and 75,000 at Elite, Master and Grandmaster. The God Wars Dungeon guide lists the doors for the other three generals and Nex.
Location and How to Get There
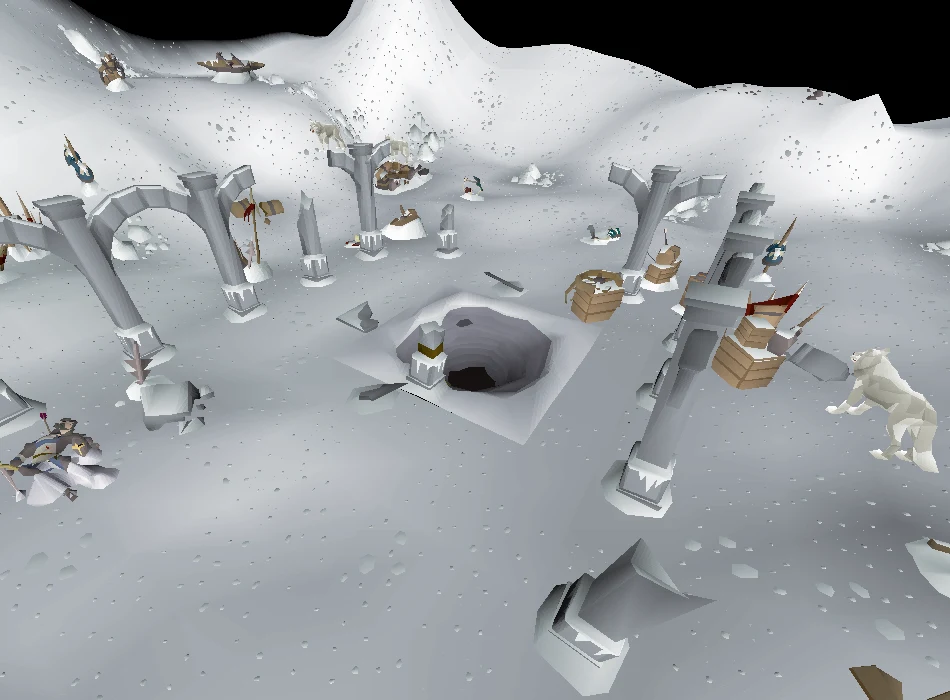
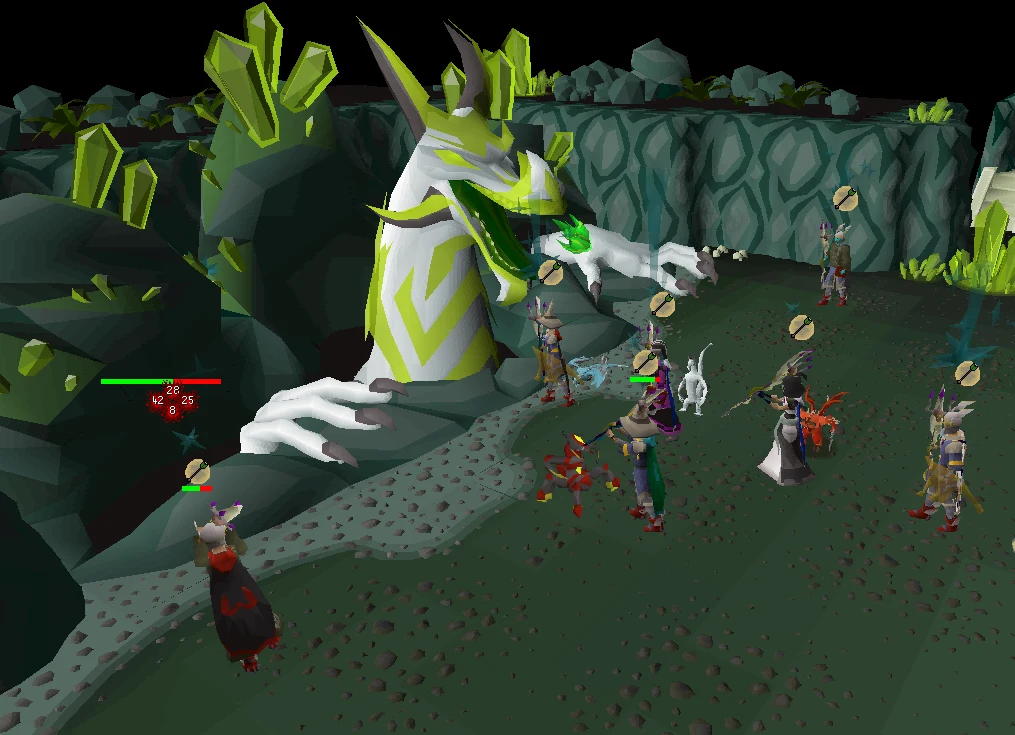
General Graardor is found in Bandos' Stronghold, in the north-west of the God Wars Dungeon.
Reach the God Wars Dungeon, then get through the Bandos door, which needs a hammer to break in. Kill count is the second gate: you need 40 Bandos-aligned kills before the door to his room opens.
Access runs through Trollheim. Death Plateau plus enough of Troll Stronghold to have defeated Dad is the conventional route, and a rope gets you down into the God Wars Dungeon the first time you visit. If you would rather skip the quest, finishing the Easy Combat Achievement tier unlocks Ghommal's hilt, which teleports you to the dungeon entrance and counts in place of Troll Stronghold.
The Bandosian door needs 70 Strength to open and a hammer to bang on, and that second part catches people out on their first trip. You do not need to carry a hammer at all if your special attack weapon is an elder maul or a dragon warhammer, since both count. Goblins inside the dungeon are the easy Bandos killcount, and they can drop a hammer themselves if you turned up without one.
Ecumenical keys skip the killcount entirely, which matters more here than it sounds: killcount is the part of a Bandos trip you repeat, not the part you learn.
Recommended Stats and Gear at Three Budgets
| Skill | Attacking | Tanking | What it is for |
|---|---|---|---|
| Strength | 70 required, 80+ recommended | 70 required | 70 is the unboostable door requirement for Bandos' Stronghold. Everything above it is kill speed. |
| Hitpoints | 80+ | 95+ | The single most useful number here, because it is what keeps a punch and a shockwave from adding to a death. |
| Defence | 70+ | 90+ | How often Grimspike and Steelwill land at all. The tank number is high for a reason. |
| Attack | 80+ | 80+ | Accuracy against a general with high Defence. |
| Ranged | 80+ | 80+ | Required if you are going the kiting route rather than standing in front of him. |
| Magic | 70+, 75+ recommended | 70+ | Blood Barrage to heal off the sergeants after the kill, and Ice Barrage if you freeze him. |
| Prayer | 44+ for Eagle Eye | 44+ | 43 is the floor for protection prayers. Piety at 70, Rigour at 74. |
Only the Strength requirement is a wall. The rest describe the account that finds Graardor comfortable rather than the account that can technically enter the room, and the tank column exists because a base tank in a team is doing a job that has nothing to do with damage.
| Slot | Melee solo or tank | Ranged kiting | Magic with a shadow |
|---|---|---|---|
| Weapon | Osmumten's fang is strongly recommended; inquisitor's mace, Ghrazi rapier, blade of saeldor or abyssal tentacle below it | Bow of Faerdhinen with full crystal, Zaryte crossbow, or an Armadyl crossbow on a budget | Tumeken's shadow, or an eye of ayak paired with confliction gauntlets if you are freezing him |
| Body and legs | Justiciar if you own it; otherwise a ranged body such as Masori, Karil's or Zamorak d'hide to blunt Steelwill, with Torva only if you are flicking | Crystal body and legs with the bow of Faerdhinen, Masori (f), or Armadyl | Ancestral, then Virtus, then Ahrim's — and the drop-off is steep |
| Shield | Elysian or spectral spirit shield for a tank, avernic defender for damage, dragonfire shield in between | Twisted buckler or dragonfire ward | Elidinis' ward (f) or an arcane spirit shield |
| Neck | Amulet of blood fury, prioritised over offensive alternatives on a tank setup | Necklace of rupture or anguish | Occult necklace |
| Hands and feet | Ferocious or barrows gloves; primordial, echo or guardian boots | Zaryte vambraces; pegasian or blessed d'hide boots | Confliction gauntlets; eternal or infinity boots |
| Ring and special | Lightbearer with a Saradomin godsword, or ring of suffering; elder maul and dragon warhammer both double as the door hammer | Venator or archers ring; a toxic blowpipe for the magic sergeant once the other two are down | Magus ring; accursed sceptre for the special |
The one substitution that changes the whole trip is justiciar. Without it, the strategy page tells you to wear a ranged body specifically so Steelwill's yellow projectiles have something to bite on, which means accepting a melee setup with a hole in it. With a full justiciar set you can carry a spectral or elysian spirit shield instead, and the combination of very high ranged defence and flat damage reduction is what turns short trips into long ones. Grimspike stops hitting hard as a side effect.
Magic is the setup with the sharpest cliff. A Tumeken's shadow multiplies the magic bonuses of everything else you are wearing, so ancestral robes, an occult necklace and confliction gauntlets are close to mandatory rather than nice to have. Lower-tier staves are only worth bringing if the rest of the set is best in slot. If you are on the standard spellbook, Graardor's 40% weakness to earth spells makes Earth Wave or Earth Surge competitive for damage, at the cost of losing Blood Barrage as your healing.
If Graardor comes up as a Slayer task, wear whichever slayer helmet variant you have for the accuracy and damage. And if you are running Guthan's to heal off the sergeants, the set doubles as perfectly reasonable tank armour, so it is not purely dead inventory weight.
| Check | Value |
|---|---|
| Prayers for its own attacks | 2 — Protect from Melee and Missiles |
| Its Defence level | 250 |
| Its Magic level | 80 |
| Its lowest defence bonus, per its infobox | stab, slash, crush, light ammunition, standard ammunition, heavy ammunition |
| Elemental weakness | 40% to earth spells |
Inventory and Supplies
| What | Why it earns the slot |
|---|---|
| Saradomin brews and super restores, in that order of quantity | Brews are the volume item because the shockwave is unavoidable chip damage rather than a mistake. Restores exist to put back what the brews take out of your combat stats and to cover prayer. |
| Bones to peaches tablets | Graardor and all three sergeants drop bones, so a full clear converts into 32 hitpoints of free healing. This is the detail that makes Bandos trips longer than Zamorakian ones. |
| A rune pouch with Blood Barrage runes and a magic switch | After Graardor is down, you stack the melee and ranged sergeants and heal off them. A blood ancient sceptre pushes that further by overhealing past your maximum. |
| A Guthan's set, if you are not barraging | The other way to leave the room with more health than you started the kill with. Teams usually give Strongstack to the base tank alone for exactly this reason. |
| A special attack weapon | Saradomin godsword pairs well with a Lightbearer; voidwaker, dragon claws, elder maul and dragon warhammer are all named options. The maul and the warhammer also open the door for you. |
| A one-click teleport | House tablet, Trollheim tablet, or a max cape for the Construction and Prayer perks. It is the difference between a bad kill and a lost inventory. |
| Divine combat or bastion potions, and a stamina if you are kiting | Kiting methods spend run energy on every lap, and the altar-door pattern is unforgiving of a character who suddenly walks when it expected a run. |
Sergeant drops feed the trip. Graardor himself drops super restores and the sergeants drop kebabs, chilli potatoes and sharks, so a long trip can be partly self-supplying. If your inventory is full and food is piling up, juggle it by picking it up and dropping it again so it does not vanish — unless you are in a private instance, where dropped items last three hours anyway.
Exact counts are left out on purpose. A justiciar tank with a spectral, a bow of Faerdhinen kiter who never gets hit, and a whip user flicking between four targets are three completely different consumption rates for the same boss.
Prayer and Spellbook
Protect from Melee is mandatory for whoever Graardor is attacking. His punch is two-thirds of his attacks and it can take 60 off you, and there is no clever alternative — the wiki says mandatory and means it.
Everyone Graardor is not attacking prays Protect from Missiles instead, because the ground slam reaches the entire chamber regardless of who he is targeting. This is the split that makes teams work: one person eats the melee prayer and everybody else covers the shockwave.
The prayer situation inverts the moment Graardor dies. All three sergeants converge on a single player, usually whoever landed the killing blow, and most setups are softest against magic. Switch to Protect from Magic first and kill Steelwill, then move to Protect from Missiles for Grimspike, whose axes are both powerful and accurate. Strongstack is the least threatening of the three and can be left until last.
If you are on the Ancient spellbook for Blood Barrage anyway, an ice ancient sceptre is worth knowing about: it is 10% more accurate against an unfrozen target and binds Graardor for 21.6 seconds, which is the foundation of the magic method.
Mechanics That Decide the Fight
| Mechanic | How you see it coming | What it does | Your answer |
|---|---|---|---|
| Punch | He is next to you and it is not a slam. Two of every three attacks are this. | Up to 60 damage in one hit, which is more than most accounts can absorb twice in a row. | Protect from Melee, active before the first swing and never dropped. This is the whole reason the prayer requirement exists. |
| Ground slam | He rears back and strikes the floor; the shockwave spreads outward across the chamber. | A Ranged attack for 15 to 35 on a successful hit, and it hits every player in the room rather than only his target. One attack in three. | Ranged defence in your armour, and Protect from Missiles for anyone he is not currently punching. There is a quirk worth knowing: despite being a Ranged attack, he can only use it while in melee range of his current target, which is exactly why kiting removes it. |
| Sergeant target selection | You landed the most recent hit on Graardor. | The three sergeants pick their target on their fifth tick, and they pick whoever damaged Graardor last. Fast weapons therefore pull them almost constantly. | In a team, wait for the base tank to get Graardor's attention before you attack, and accept that a slower weapon draws less minion attention. A Dinh's bulwark on Defence mode never registers as having damaged him, so a bulwark tank is never focused at all. |
| Sergeant Steelwill | Yellow projectiles arriving from the magic sergeant. | Up to 15 per hit, and he is the one who hits most often against a conventional melee setup. | Wear something with magic defence. A ranged body is the cheap fix; justiciar with a spectral spirit shield is the expensive one, and it cuts his accuracy rather than just his damage. |
| Sergeants Grimspike and Strongstack | Thrown axes from the ranged sergeant, a flail from the melee one. | Up to 21 and up to 15 respectively. Grimspike is the dangerous half of that pair. | Kill Grimspike second and Strongstack last. Strongstack is also the ideal Guthan's target, since you can afford to take your time on him. |
| Walking under him | Nothing to watch for. This one is a move you make. | Standing on his tile buys a tank time to eat without taking a hit, and used at the right interval it makes him miss an attack outright. | Use it deliberately rather than in a panic. It is the melee player's substitute for the movement a kiter gets for free. |
Graardor's attack speed is 6, which is 3.6 seconds between attacks. A 4-tick weapon swings every 2.4 seconds, so you can land two hits before he lands one. The rhythm that falls out of that is: attack twice, walk under him, come back out and attack again. If you are running both a shield and a defender, the defender goes on every odd-numbered attack as long as nothing interrupts the cycle.
None of his behaviour changes with his health. There is no enrage, no phase and no summon, which is why the fight is decided by your armour and your discipline rather than by a counter.
| Property | Value |
|---|---|
| Combat level | 624 |
| Attack styles | Crush, Ranged |
| Attack speed | 6 ticks |
| Attacks on sight | Yes |
| Poisons you | No |
| Size | 4 tiles |
| Immune to cannon | No |
| Immune to thralls | No |
Where General Graardor Sits in Progression
Graardor and K'ril Tsutsaroth are the usual first generals. Commander Zilyana and Kree'arra come after.
Solo Fight Strategy
- 1
Enter with Protect from Melee already on and your health topped up.
Graardor is aggressive immediately.
- 2
Take the first hit on the tank if you are in a team, or on yourself if you are solo, and only start attacking once he has committed to a target.
- 3
Attack twice, walk under him, and step back out.
Keep the two-for-one rhythm rather than clicking continuously.
- 4
Hold your health above 60 at all times, because that is what a punch plus a sergeant hit can total.
- 5
Use the walk-under to eat.
Standing on his tile is the only moment in the fight where you can heal without paying for it.
- 6
When he dies, switch to Protect from Magic immediately and kill Steelwill, then Protect from Missiles and kill Grimspike, then Strongstack.
- 7
Before you leave the room, stack the remaining sergeants and heal off them with Blood Barrage or Guthan's, and cash your bones into peaches.
Trip length is decided in the healing phase after the kill. Lure Strongstack over to Grimspike so both are inside one Blood Barrage, and try to have them attacking on different ticks so you are not taking two hits per heal. A blood ancient sceptre earns its place here because it heals about 2.5% more effectively and lets you overheal by 10% of your base hitpoints, so the sergeants become a health bank rather than a chore.
Solo melee deserves a warning that the strategy page gives explicitly. It is the simplest way to fight him and it produces the shortest trips and the slowest kills of any method. With no prayer flicking between Graardor and the sergeants, and gear below the recommended tier, a trip can amount to a single kill. That is not a reason never to melee him; it is a reason to know which version of the fight you have signed up for.
Positioning and Movement
For a melee player there are exactly two useful places to be: in front of him, and underneath him. Underneath is where you eat, where you reset the attack rhythm, and where you occasionally make him whiff entirely. Everywhere else is just standing still while a shockwave finds you.
For a ranged player the geometry is the entire method. Because his slam only fires when he is in melee distance of his target, a kiter who keeps moving is never attacked by him at all.
Teams should think about where the sergeants end up rather than where the general is. You want Strongstack and Grimspike close enough together at the end of the kill that one barrage covers both, and that is easier to arrange while Graardor is still alive than after he has died and everything has scattered.
Beginner Plan, Then the Advanced One
Your first trips
- 1
Do your first few kills in a team if you can, and do not attack Graardor until the base tank has clearly taken his attention. The most common new-player death at Bandos is pulling a boss you were not dressed to tank.
- 2
Bring more brews than you think and fewer offensive switches.
Nothing in this fight is a damage check.
- 3
Learn the walk-under before you learn anything else.
It is the eat button, the miss button and the tick-fix button all at once.
- 4
Practise the post-kill prayer sequence deliberately: magic, then missiles, then whatever.
More Bandos deaths happen in the ten seconds after the general dies than during the kill itself, because three sergeants suddenly point at one person.
- 5
If a kill has gone badly, tick eating — healing at critically low health on the tick before a hit lands — is a real technique here, but it is one to practise when the trip is already lost rather than one to plan around.
Once the kill is boring
- The altar-door method is the reason to own a 4-tick bow. You alternate red-X clicks between the Bandos altar and the entrance door, attacking on marked tiles as your true tile passes them, and done correctly Graardor never attacks you at all. A bow of Faerdhinen on rapid is the standard weapon, and enabling the current-tile highlight — in the official client settings or the Tile Indicators plugin — is close to mandatory, because the method is built entirely on where your true tile is rather than where your character appears to be.
- Learn the west row before the middle row. The west row is used for the first kill of a trip and can be used for all of them; it is slower, because you spam-click the shoot-door tile and therefore start attacking later, but getting out of cycle at the start of the middle row means taking a melee hit, and that usually costs more time than the west row ever did.
- Two rules keep the altar-door cycle intact. You cannot heal during a red-X click, so heals go between the second and third attack or between the third and fourth. And when you do fall out of cycle, stop attacking on the intermediate tiles, run straight to the shoot-door or shoot-altar tile with Protect from Melee on, and click the door the instant his attack lands. Setting quick prayers to Protect from Missiles with Rigour makes the switch back cheap.
- The magic method is a freeze loop rather than a kite. Ice Barrage him, attack from range until he breaks out, then wait a few seconds before rebarraging, because a freeze applied immediately after one wears off does not bind. Swap to Protect from Melee any time he closes the gap.
- Teams have a melee-only trick that is worth knowing: drop an item on Graardor's spawn tile, have everyone fight in melee distance, and whoever he targets rapid-clicks the dropped item. He gets stuck and cannot attack, and the rest of the team keeps hitting until he switches target and the next player takes over.
- Running two accounts at once and hopping worlds to skip the respawn timer is the maximum-efficiency version of Bandos. The usual shape is a tank alt on Protect from Melee holding a Blood Barrage stack of the melee minion and Graardor's south-west tile on top of a ranged or magic minion, with the main on Protect from Missiles standing under the alt with a Tumeken's shadow. It is a two-client discipline problem rather than a combat one.
Team Roles
| Role | The job | Gets it wrong by |
|---|---|---|
| Base tank | Takes Graardor first, holds Protect from Melee for the whole kill, and wears ranged defence with enough magic defence to survive Steelwill. Usually fights Strongstack alone with Guthan's afterwards. | Losing Graardor's attention to a fast-weapon attacker, then being the one who has to survive in gear built for a different job. |
| Bulwark tank | Full justiciar with a Dinh's bulwark on Defence mode, maximising ranged defence. Because they never damage Graardor, the sergeants never register them as a target. | Expecting kills. This role reliably gets none, and the player has to be happy with that before the trip starts. |
| Melee attacker | Pure damage in max-DPS gear, praying Protect from Missiles, attacking only after the tank has aggro. | Opening on Graardor before the tank has hit him, which hands the general to someone wearing no defensive gear at all. |
| Ranged attacker | Damage from outside melee distance, which also keeps them out of range of Strongstack. Finishes Grimspike after the kill. | Out-clicking everyone with a fast weapon and inheriting all three sergeants on Graardor's death. |
| Freezer or shadow user | Ice Barrage to lock Graardor down, then Blood Barrage to top the group up off the stacked sergeants. | Rebarraging the instant a freeze expires, which does not bind and wastes the runes. |
Teams reduce the frequency of the ground slam simply by killing him faster, which is why a group takes less chip damage per kill than a solo does. It also means the tank can afford to prioritise ranged defence over magic defence, because the sergeants are chasing whoever is damaging the general rather than the person standing in front of him.
Boost Potion Share and Stat Restore Pot Share extend duo and trio trips substantially, and whoever is sharing the super restores should carry a holy wrench or an item with the same effect.
Drops and What General Graardor Is Worth
The Bandos chestplate and tassets are the reason this boss stays busy. They are the tank armour that shows up in the recommended setups for the other three generals, which makes Graardor the general who funds the rest of the dungeon. The bandos hilt is the rarer prize on top of that.
| Drop | Rate |
|---|---|
| Bandos chestplate | 1/381 |
| Bandos tassets | 1/381 |
| Bandos boots | 1/381 |
| Bandos hilt | 1/508 |
| Godsword shard 1, 2 or 3 | 1/762 each (1/254 for any shard) |
| Pet general graardor | 1/5,000 |
Any one of the three armour pieces comes at 1/127. Counting every unique, shards included, you get one roughly every 73 kills, or about 1 in 102 if you leave the shards out.
There is a second, quieter payout that the drop tables tend to underplay. Graardor drops super restores and his sergeants drop kebabs, chilli potatoes and sharks, so a long trip partly resupplies itself while you are still in the room. Combined with bones to peaches on every clear, that is the difference between a Bandos trip and a Zamorakian one.
Combat Achievements
One unlock outside the task list changes how you fight him. The strategy page's only stated reason to solo Graardor in melee, a method it otherwise advises against, is The Frozen Door miniquest: the general only gives you his frozen key piece if you dealt the most damage to him (otherwise his bodyguards drop it at 1/20). If you are chasing that, the melee solo setup with an Osmumten's fang and prayer flicking between the general and the sergeants stops being an inefficient choice and starts being the point.
Combat Achievement tiers also reduce the Bandos killcount you need to enter, from 40 to 35 at Hard, 30 at Elite, 25 at Master and 15 at Grandmaster, which shortens every trip you take here for the rest of the account's life.
General Graardor has Combat Achievement tasks, and a 60 max hit is the number to plan them around: any task that restricts your supplies or your gear is a materially different fight at that damage.
Task lists move with updates — read the current list in game.
Ironman Notes
Slayer masters who assign General Graardor: Konar, Nieve, Duradel. Each kill is 338 Slayer XP.
Without a Grand Exchange, bandos chestplate and tassets, bandos hilt has to be earned rather than bought, and this is the fastest table it sits on.
Graardor is one of the friendlier generals for an Ironman because the fight partly feeds itself. Bones to peaches on every clear, super restores from the general, and food from the sergeants mean a trip does not consume supplies at the rate the inventory list implies, and juggling excess food keeps it from despawning while you keep killing.
The awkward part is armour. Without justiciar you are told to wear a ranged body for magic defence, which means an Ironman is often fighting in a deliberately compromised melee setup for a long time. Guthan's is the practical answer: it heals off Strongstack and Grimspike and it is respectable tank gear in its own right, so it is not a set you are carrying for one purpose.
Bandos armour is also a self-solving problem. The chestplate and tassets you are farming here are the same pieces the setup table wants you to be wearing, so the fight gets easier as a direct result of doing it.
Common Mistakes and Death Causes
| What happened | Why it happened | The fix |
|---|---|---|
| A punch and a shockwave landing in the same few ticks | You let your health drift under 60 because nothing had hit you for a while. | Treat 60 as the floor rather than a comfort zone. It exists precisely so that no combination of his two attacks and a sergeant can total a kill. |
| Inheriting Graardor in attacker gear | You damaged him before the base tank had his attention, and the aggro rule handed him to you. | Wait for the tank's first hit. If it happens anyway, you are tanking the rest of that kill — say so, and let the tank re-establish on the next spawn. |
| All three sergeants converging after the killing blow | Whoever finishes Graardor becomes the target, and most players are still praying melee at that moment. | Switch to Protect from Magic on the death animation and go straight for Steelwill. The prayer change matters more than the target choice. |
| Steelwill grinding you down in a melee set | Melee armour has poor magic defence, and he is the sergeant that hits most consistently against it. | A ranged body, or justiciar with a spectral spirit shield. This is the single most common reason a Bandos trip ends early with supplies left over. |
| Falling out of the altar-door cycle and freezing | One mistimed click means your true tile is not where you think it is, and Graardor gets a free melee attack on a player wearing crystal armour. | Switch to Protect from Melee, abandon the intermediate attacks, run to the shoot-door tile, and re-enter the cycle after his attack lands rather than trying to salvage the lap. |
| Eating while standing in front of him | A heal costs you a tick you needed for the prayer or the step, and the punch arrives anyway. | Walk under him first. It is the one position in the fight where healing is free. |
Graardor gives you an easy out that players forget in the moment: he cannot follow you, and the sergeants are not worth dying to. A one-click teleport out of a bad kill costs you one respawn and nothing else, and the trip continues after a bank run.
If you are still in the room but the kill has gone wrong, the walk-under is the recovery tool. Standing on his tile stops the punch, gives you the ticks to brew back up, and lets you decide whether to continue or leave with a full health bar rather than a panicked one.
FAQ
Do I really need a hammer?
Only to bang on the door, and only if your special attack weapon is not an elder maul or a dragon warhammer, both of which do the job. Goblins in the dungeon drop hammers too, so a forgotten one is a minor inconvenience rather than a lost trip.
Can I boost into the 70 Strength requirement?
No. The Strength requirement on Bandos' Stronghold cannot be boosted, which makes it the one number in this guide you have to actually train.
Melee, ranged or magic?
Melee is the simplest and produces the shortest trips and slowest kills. Ranged is the straightforward choice for a solo player because a correctly executed kiting method avoids all damage from him. Magic with a Tumeken's shadow is the highest ceiling and the least forgiving of gear downgrades. If you own a bow of Faerdhinen and full crystal, range him.
Why do the sergeants keep attacking me and not the tank?
Because they target whoever damaged Graardor most recently, checked on their fifth tick. A fast weapon means your hit is more likely to be the last one when that check happens. Slow down, or let the tank hold the general while you take the aggro knowingly.
What is the altar-door method actually doing?
It exploits the fact that Graardor's ground slam only fires when he is within melee distance of his target. By alternating red-X clicks between the altar and the entrance door and attacking on specific tiles, you are never stationary in his range on the tick he would attack, so he never lands anything. It needs a weapon with an attack speed of 4 to work.
How many kills should I expect per trip?
It varies more here than at most bosses, from a single kill for an under-geared melee solo to a full inventory of loot for a justiciar tank or a clean kiter. Rather than trusting a number, watch what runs out first on your first three trips — brews, restores or patience — and rebalance the inventory around that.
Can General Graardor be a Slayer task?
Yes, as a boss task. Buy Like a Boss for 200 Slayer points and Konar, Nieve (or Steve) and Duradel can assign him, as long as you have finished Death Plateau and have 70 Strength. You pick between 3 and 35 kills, and each Combat Achievement tier adds 5 to that cap, up to 65 at Grandmaster. Wear your slayer helmet on task for its accuracy and damage bonus.
How rare is Bandos armour?
The chestplate, tassets and boots are 1/381 each, so any armour piece is 1/127. The hilt is 1/508 and the pet 1/5,000. The full list is in the drop table above.
Still stuck on a mechanic? Ask the team on our Discord, it is free.
Bottom Line
Graardor is a discipline test with a very short list of rules. Hold Protect from Melee, keep your health above 60, do not steal the general from your tank, and switch to Protect from Magic the moment he falls over. Everything beyond that is optimisation: the walk-under rhythm, the altar-door cycle, the barrage stack that turns three sergeants into a healing station.
He is also the general most worth learning properly, because the Bandos armour he drops is the armour the rest of this dungeon expects you to be wearing. If Death Plateau and Troll Stronghold are the only things standing between you and the Bandosian door, getting those quests off the list is the faster half of the problem to solve.
If General Graardor is blocking a Combat Achievement or an unlock you actually want, our Bandos boss service is played by hand, with no automation. Otherwise the bosses list has the full index.
Sources
Numbers and mechanics on this page come from these 2 OSRS Wiki pages:
Enjoyed the guide?
Drop a like — it helps other Adventurers find the good stuff.
Community
Comments
Silence in the hall…
Be the first Adventurer to leave a mark.
Join the thread
Add a comment
Tips, drops, or “this carried my account” — keep it useful.