


The short version
30-second read- Block Tumeken's troughs in phase 1. That gives you Elidinis' in phase 2, the one the wiki recommends, and Tumeken's easier phantoms in phase 3.
- Bring liquid adrenaline for the core. It halves special attack cost for 150 seconds, so dragon dagger specs go further before you swap to a fast melee weapon.
- Melee every Energy Siphon. They are immune to ranged and magic and spawn at 80%, 60%, 40% and 20% of the returning Warden's HP.
- Save ambrosia for the enrage. Drink it at 50 HP or lower, since brewing there drains your stats when you need them most.
Overview: Tumeken's and Elidinis' Warden at a Glance
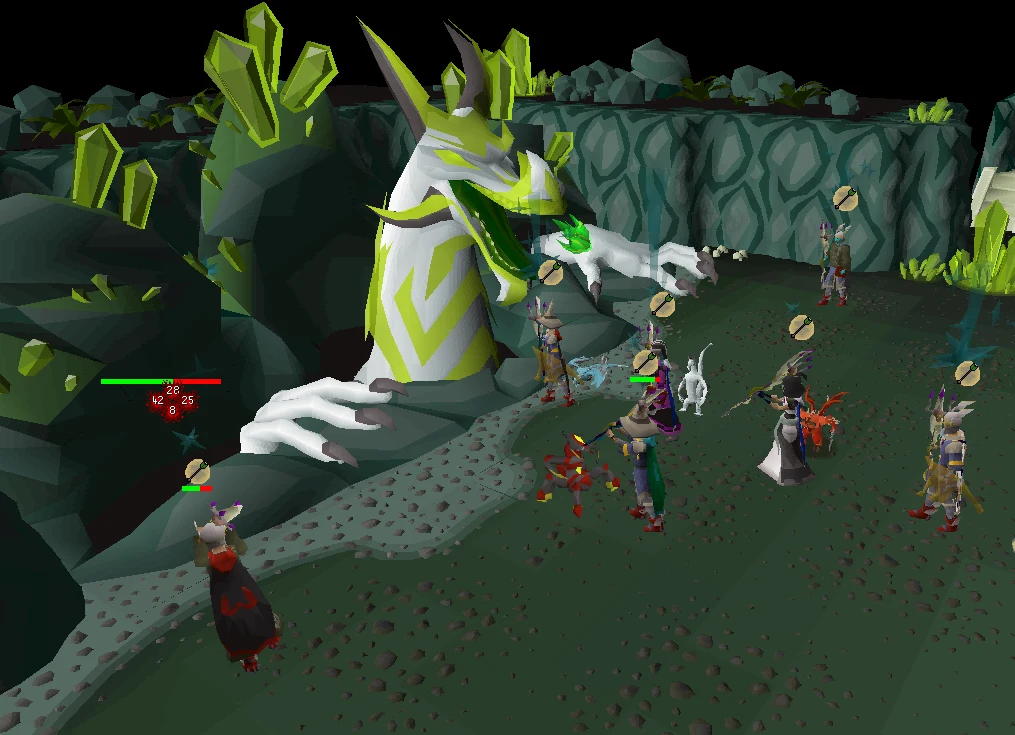
The Wardens are the final boss of Tombs of Amascut, unlocked after you clear all four paths. The fight has three phases: in phase 1 you attack the obelisk while it charges both Wardens, in phase 2 one Warden fights you until its core pops out for melee damage, and in phase 3 the other Warden comes back with floor slams, Energy Siphons, phantom bosses and an enrage at 5% HP.
In phase 2, Tumeken's Warden prays against melee and magic, so you range it. Elidinis' Warden prays against melee and ranged, so you mage it. Which one you get depends on whose energy troughs you block in phase 1.
This is the fight that decides most ToA raids, because you arrive with whatever supplies your paths left you. Invocation planning shows up here as a supply problem.
| Field | Detail |
|---|---|
| Classification | ToA final boss |
| Group | raid |
| Difficulty | 5 / 5 in our boss index |
| Solo or team | Solo or team (1 to 8 players) |
| Access requirement | Tombs of Amascut, after all four paths |
| Notable reward | The raid chest: Tumeken's shadow, masori armour, Osmumten's fang and more |
| Phase 2 Warden | Combat 489. Max hit 22 (Tumeken's) or 20 (Elidinis') |
| Phase 3 Warden | Combat 544, 880 hitpoints before scaling, max hit 26 |
| Elemental weakness | 50% to earth spells |
| Released | 24 August 2022 |
Access Requirements
You reach the Wardens by finishing the Path of Crondis, Scabaras, Het and Apmeken in any order. Every party member has to speak to Osmumten before the fight starts.
Tombs of Amascut itself needs Beneath Cursed Sands. The boss requirements checklist lists the other raid gates by group.
Location and How to Get There
The Wardens are fought on the tomb's lower level, which opens once all four paths are complete.
The Wardens are ancient automatons Tumeken built, one imbued with his essence and one with Elidinis'. Before you go down, reapply smelling salts and drink liquid adrenaline if you plan to use special attacks on the core.
Recommended Combat Stats and Gear
| Phase | Best options |
|---|---|
| Phase 1 (obelisk) | Tumeken's shadow, Bow of Faerdhinen or toxic blowpipe after defence drains. The obelisk is weakest to standard ranged. |
| Phase 2 (Warden) | Twisted bow against Tumeken's, Tumeken's shadow against Elidinis'. Your hits always land, but damage scales with your accuracy bonus. |
| Phase 2 (core) | Dragon dagger specs under liquid adrenaline, then a fast melee weapon such as a Ghrazi rapier or Blade of Saeldor. |
| Phase 3 | Tumeken's shadow or twisted bow, with Bow of Faerdhinen or a zaryte crossbow below that, plus a melee weapon for the siphons. |
The obelisk's Defence drains from 100 to a minimum of 60, and the phase 3 Warden's from 150 to 120. Defence drains are worth it on both.
Inventory and Supplies
- Ambrosia saved for the phase 3 enrage. Use it if you drop to 50 HP or lower.
- A keris partisan of the sun as a backup heal if you have no ambrosia.
- Liquid adrenaline for the core, which halves special attack cost for 150 seconds.
- Prayer restores for all three protection prayers in phase 2.
- A melee weapon for the core and the phase 3 siphons.
Phase 1: The Obelisk
The obelisk sends orbs down energy troughs to charge both Wardens. Stand on a trough to block them: each orb you absorb deals 3 damage, and blocking one side throws the Wardens' charged attacks out of sync so they do not fire together.
When a Warden is charged it fires a Charged Shot or UFOs. Solo, Elidinis' shot is capped at 45 and Tumeken's at 30. In a team, spread out for Elidinis' blue shot and stack together for Tumeken's orange one, which drops the caps to 30 and about 7.
The Warden you starve of energy the most is destroyed when the obelisk dies and returns in phase 3; the other one activates for phase 2. Most players block Tumeken's side, so they mage Elidinis' Warden in phase 2 and meet Tumeken's Warden, with Zebak's and Ba-Ba's phantoms, in phase 3.
Phase 2: Elidinis' or Tumeken's Warden and the Core
| Mechanic | What it does | Correct response |
|---|---|---|
| Warden prayers | Always Protect from Melee, plus Magic (Tumeken's) or Missiles (Elidinis') to start. | Range Tumeken's, mage Elidinis'. Tumeken's chases you into melee range, so keep Protect from Melee up against it. |
| Divine Projectile | Above 55% HP. Disables overheads and fires a red scimitar, white arrow or blue spell. | Turn on the matching prayer: melee, missiles or magic. |
| Imprisonment | Below 55% HP. A dark projectile at your last tile encases you in stone. | Step off the tile. You can still eat and pray while imprisoned. |
| Converging Beam | Red lightning on the obelisk. Beams fire out then converge back to it. | Stand in the quadrant opposite where the beams start. |
| Windmill Beam | Orange lightning. Beams sweep around the room like a windmill. | Move off the glowing floor before it fires. |
| Lightning Skull | Yellow lightning. Skulls land and discharge in a 7x7 area. | The two tiles directly north, south, east and west of where a skull lands are safe. Diagonals are not. |
| Core | Pops out when the Warden's balance bar fills. Core damage counts five times against the Warden. | Melee it. Melee always hits its max on the core, so dump dragon dagger specs while it is exposed. |
The core stays out for 21 ticks while the Warden is above 80% HP, 29 ticks from 80% to 60%, and 37 ticks below 60%. Teams aim to down the Warden in two or three core exposures.
Phase 3: Siphons, Phantoms and the Enrage
The returning Warden uses no prayers and attacks by raising and slamming the floor for typeless damage. It slams its right side first, then its left, then both: stand on the opposite side for the single slams and in the centre columns in front of it for the double.
At 80%, 60%, 40% and 20% HP it creates Energy Siphons. They are immune to ranged and magic and start at 1 hitpoint, so melee each one until it turns to face the Warden. Reversed siphons damage the Warden; siphons left alone detonate in a shockwave from the centre that can kill you outright at high raid levels.
During the second and third siphon batches a phantom boss joins in. Elidinis' Warden brings Akkha's and Kephri's phantoms, Tumeken's Warden brings Zebak's and Ba-Ba's, and any invocations you set for those bosses apply to their phantoms.
At 5% HP the Warden enrages once, heals 20% of its max HP and raises its Defence to 180. The floor is torn away row by row from the back and red lightning strikes marked tiles, so keep moving, keep prayer up and finish it fast.
Wardens Invocations
- 1
Ancient Haste
(+10): the Wardens charge faster in phase 1.
- 2
Acceleration
(+10): the phase 2 Warden attacks faster and the obelisk charges faster.
- 3
Penetration
(+10): obelisk attacks hit harder in phase 2 and briefly disable overhead prayers.
- 4
Overclocked
and Overclocked 2 (+10 each): phase 3 slams come 1 and 2 ticks faster.
- 5
Insanity
(+50): slams 3 ticks faster, less time for siphons, faster lightning and floor removal, and faster phantoms in the enrage.
Where the Wardens Sit in the Raid
The Wardens always come last. The usual learning order for the paths is Zebak, Kephri, Akkha, then Ba-Ba, and your phase 3 phantoms are two of those four bosses. Nothing in the raid is harder.
Drops and What the Wardens Are Worth
Killing the Wardens opens Osmumten's burial chamber, where the raid chest rolls your reward. One unique at most drops per raid: masori armour, the lightbearer, Osmumten's fang, Elidinis' ward or Tumeken's shadow. Your chance depends on your raid level and points, and the phase 2 and 3 Wardens give 2x and 2.5x points per damage.
Combat Achievements
Tombs of Amascut has separate Combat Achievement lists for Entry, Normal and Expert mode. Expert tasks only count if you end the raid at raid level 300 or higher.
Task lists move with updates, so read the current list in game. The Combat Achievements guide covers how the tiers unlock.
Ironman Notes
A death anywhere in the tomb costs a Hardcore Ironman their status, so HCIMs should give the Wardens extra margin. The Wardens are where low-supply runs fail, so an iron should arrive with ambrosia unused and enough brews for phase 3.
Common Mistakes and Death Causes
- Blocking both troughs evenly in phase 1, so both Wardens fire their charged attacks together.
- Attacking the phase 2 Warden with a style it is praying against.
- Missing the prayer swap on Divine Projectile after it disables your overheads.
- Standing on the central north, east, south or west tiles in phase 2, where the obelisk's beams hit.
- Using ranged or magic on Energy Siphons, which are immune to both.
- Brewing in the enrage instead of using ambrosia, which drains your stats when you need them most.
FAQ
How do I choose which Warden I fight in phase 2?
Block the energy troughs of the Warden you want to avoid. The one you starve most is destroyed at the end of phase 1 and returns for phase 3.
Should I fight Elidinis' or Tumeken's Warden in phase 2?
The wiki recommends Elidinis' Warden. Tumeken's is more tedious in phase 2 because it chases you into melee range, and Elidinis' phase 3 phantoms (Akkha and Kephri) are harder than Tumeken's (Zebak and Ba-Ba).
Which protection prayer should I use at the Wardens?
Protect from Melee when the phase 2 Warden is next to you, and the matching prayer for Divine Projectile. Phase 3 slams are typeless, so prayers do not block them.
How hard does the Warden hit?
Phase 2 max hits are 22 for Tumeken's and 20 for Elidinis', and the phase 3 Warden's max hit is 26, all before raid level scaling.
What is the Warden core?
The weak point that pops out in phase 2. Damage to it counts five times against the Warden, and melee always hits its max on it.
What kills people at the Wardens?
Unreversed Energy Siphons in phase 3 and the enrage, where the floor disappears and lightning strikes while the Warden heals 20%.
Still stuck on a mechanic? Ask the team on our Discord, it is free.
Bottom Line
Nobody makes the Wardens consistent quickly. Block one side in phase 1, hit the phase 2 Warden with its open style and melee the core, then treat phase 3 as a siphon and enrage check. Expect a few deaths while you learn it; each one costs 20% of your points.
The chest only opens after a Wardens kill, so this is the fight most worth practising. If you would rather skip the learning deaths, our ToA raid service runs the full raid, Wardens included, by hand. The bosses list has the rest of the PvM index.
Enjoyed the guide?
Drop a like — it helps other Adventurers find the good stuff.
Community
Comments
Silence in the hall…
Be the first Adventurer to leave a mark.
Join the thread
Add a comment
Tips, drops, or “this carried my account” — keep it useful.