

The short version
30-second read- Swap to your slowest, hardest-hitting weapon for Clones. Parries hit with 100% accuracy and her flat armour drops to 4, so an elder maul or Soulreaper axe wins.
- Stay on Eyatlalli's glyph during standard attacks. Off it the tick damage starts at 1 and doubles up to 16, and the glyph moves clockwise every two attacks.
- Make food and potions inside Neypotzli. Moonlight potions need 38 Herblore, bream or moss lizard needs 30 Cooking, and both beat anything banked.
- Leave the scythe and drain specs at home. Flat armour takes 6 off each of the scythe's three hitsplats, and Defence drain does not work on the Moons.
Eclipse Moon at a Glance
Eclipse Moon is one of the three Moons of Peril: a level 329 melee boss with 500 Hitpoints in Neypotzli, the prison under Cam Torum in Varlamore. You unlock it by finishing the Perilous Moons quest. It is weak to stab and has 6 flat armour, which takes 6 damage off every hit you land, so slow weapons that hit hard do better here than fast ones.
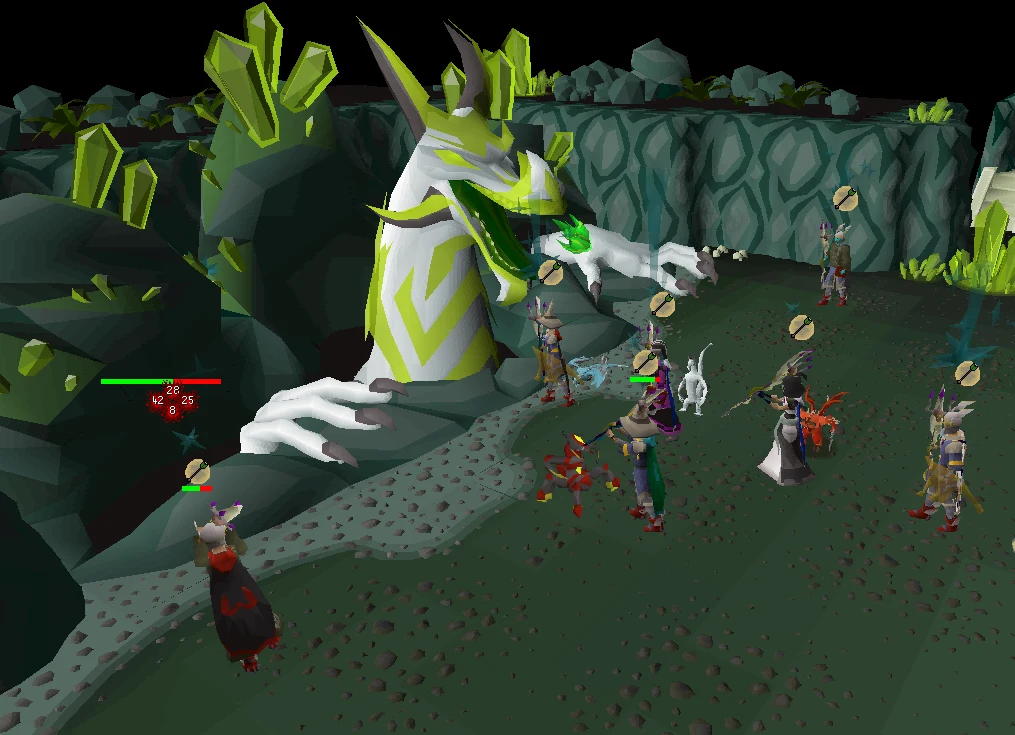
The fight is a loop. You stand on Eyatlalli's glowing glyph while the Moon throws three-hit standard attacks, and after six of those she uses a special: Searing Rays (keep the moving moon shield between you and her) or Clones (turn to face each clone as it spawns to parry it). On mid-level gear the Clone phase is where most of your damage comes from, because every parry is a free hit back on the boss.
Protection prayers do nothing against any Moon attack. Spend your prayer points on Piety, or on Steel Skin, Ultimate Strength and Incredible Reflexes if you do not have Piety yet.
| Field | Detail |
|---|---|
| Combat level | 329 |
| Hitpoints | 500 |
| Weakness | Stab (0 stab defence, +100 slash and crush) |
| Flat armour | 6, dropping to 4 during the Clone phase |
| Standard attack | Typeless melee, 3 hits, max 4 + 8 + 20 = 32 |
| Protection prayers | No effect |
| Magic and Ranged defence | +500 (15% air weakness, still not worth using) |
| Attack speed | 6 ticks |
| Unlock | Perilous Moons quest |
| Location | Neypotzli, south end of the Streambound Cavern |
| Unique drops | Eclipse Moon helm, chestplate, tassets, eclipse atlatl (1/224 each) |
| Released | 20 March 2024 |
Requirements and How to Get There
The only hard requirement is Perilous Moons. That quest needs 48 Slayer, 20 Hunter, 20 Fishing, 20 Runecraft and 10 Construction, none of them boostable, plus Twilight's Promise (which needs Children of the Sun). Our Perilous Moons quest guide walks through the unlock step by step.
For the fight itself the wiki suggests 70+ Attack, Strength and Defence, 75+ Hitpoints and at least 34 Prayer for the three stacking boost prayers. The boss requirements checklist lists the other Varlamore gates if you want to clear them in one go.
- 1
Crush a calcified moth to teleport to Cam Torum, then run to the Neypotzli entrance at the north end of the city.
- 2
Or fly the Quetzal Transport System to the Cam Torum landing site (you build it once with 10 quetzal feed, 4 soft clay and 3 limestone bricks) and run north through the city.
- 3
Or fly to the Teomat and run around the west side of the mountain.
- 4
With 47 Agility, teleport to Ralos' Rise with the Pendant of Ates and climb down the rock shortcut.
Inside Neypotzli, take the north-east exit from the antechamber into the Streambound Cavern. The camp is up the path, and the Eclipse Moon chamber is at the south end of the cavern.
Best Gear and Weapons for Eclipse Moon
Defence pays off here more than at most bosses at this level. The Moon's attack rolls against your slash defence, and once one of the three hits misses the rest miss too, so a better defence roll means fewer 20s and less eating. The wiki recommends armour with both strength and defence, like Bandos or Torva, and Barrows pieces over glass gear such as obsidian.
| Phase | Top end | Mid level | Budget |
|---|---|---|---|
| Standard attacks | Soulreaper axe (slash), Ghrazi rapier (stab) | Blade of Saeldor (stab), Noxious halberd, Osmumten's fang (stab) | Zamorakian hasta (stab), Zombie axe, Dragon sword (stab), Abyssal whip |
| Clone phase | Dharok's greataxe with the full set at low HP, Soulreaper axe | Elder maul, Colossal blade, Noxious halberd | Godsword, Crystal halberd, Zombie axe, Belle's folly |
| Special attack | Crimson kisten, or Crystal halberd as the last hit before a phase change | Voidwaker, Dragon claws | Dragon dagger |
The scythe of Vitur does worse than a Ghrazi rapier against Eclipse, because each of its hitsplats loses 6 to flat armour. Defence-draining specs and Death Charge have no effect on any Moon, so leave the dragon warhammer and Bandos godsword in the bank.
Magic and Ranged are not worth it. All three Moons have +500 magic and ranged defence, and the 15% air weakness added in June 2025 does not change that. During the Clone phase only melee weapons damage the boss at all.
Supplies and Inventory
Bring combat gear, your weapon switches and a way out. Food and potions are made inside Neypotzli. The supply crates at each camp hold the tools (vials of water, pestle and mortar, nets, rope), and the results beat anything you could bring from a bank.
- Moonlight potions: pick a moonlight grub from a grubby sapling, grind it with a pestle and mortar, and add the paste to a vial of water. Needs 38 Herblore. One dose boosts Attack, Strength and Defence and restores prayer, scaling with your Herblore level.
- Food: cooked bream (Fishing) or cooked moss lizard (Hunter), both needing 30 Cooking. Bream heals a third of your Cooking or Fishing level, whichever is lower. Moss lizard heals a third of Cooking or half of Hunter, whichever is lower.
- Moonlight moths: with 75 Hunter and a butterfly net (85 Hunter barehanded) each moth restores 22 prayer points between fights.
- A slow, hard-hitting weapon for the Clone phase, a spec weapon such as dragon claws, and an emergency teleport. Each boss room also has a quick-escape staircase.
Everything you make is destroyed when you leave Neypotzli, and moonlight potions turn back into vials of water, so make only what the trip needs. If your Herblore is below 66, the wiki suggests bringing one super combat or super defence potion as well.
Mechanics: Standard Attacks, the Glyph and the Curse
The standard attack is three melee hits with max hits of 4, 8 and 20. If one hit misses, every hit after it in that attack misses as well. The damage is typeless, which is why protection prayers do nothing.
Eyatlalli's glyph lights up one of the eight moon-phase sigils around the boss. Stand on it during standard attacks. Off the glyph you take damage every tick, starting at 1 and doubling up to 16 per tick, which kills fast. The glyph moves clockwise every two standard attacks, and when it reaches the full moon or new moon sigil the boss starts a special attack.
Every hit that lands adds Curse of the Moon stacks: 1, 2 and 5 for the three hits, up to 127, decaying by 2 every 5 ticks. Eclipse's curse makes your attacks glance off her shield. A glancing blow has its max hit cut by 12 (8 during Clones), and the chance of glancing climbs to 100% at 100 stacks. That is why getting hit during Searing Rays hurts your damage for the rest of the fight.
Clone Phase: How to Parry All 15 Attacks
When the glyph reaches the full moon sigil, you are shoved to the centre of the room and bound in place. Clones of the Eclipse Moon spawn around you in five waves of three, 15 attacks in total. Turn to face each clone as it appears. Clicking the tile under it, or one tile away from it, is enough.
Each successful parry sends an instant melee hit back at the boss with 100% accuracy, for every attack style since a July 2024 update, and her flat armour drops from 6 to 4 for the phase. Weapon speed stops mattering, so swap to the slowest, hardest-hitting weapon you own: elder maul, Soulreaper axe, godsword or crystal halberd. Ranged and magic weapons deal no damage in this phase.
Players with lower damage output do most of their Eclipse damage here. The Hard Combat Achievement The Clone Zone takes that to the extreme: kill her by only attacking her clones.
Searing Rays: Walking With the Shield
At the new moon sigil a moon shield appears, the boss shoves you behind it and starts firing rays of light. The shield makes one full lap of the room at walking pace and pauses on each corner just long enough for a walking player to keep up. Walk with it and stay behind it until the lap ends.
A ray does little damage, but each hit adds a big chunk of curse stacks and so more glancing blows afterwards. If you know the four corners of the path, you can also time a run from one corner to the next just after the shield starts moving, which dodges every ray.
Kill Order and Farming Route
The wiki's standard route starts with Eclipse. After you kill a Moon you are teleported to a camp, and the order Eclipse, Blue, Blood puts you next to the next fight every time.
- 1
From the antechamber, go north-east into the Streambound Cavern, restock at the camp and kill Eclipse Moon.
- 2
You land at the Earthbound Cavern camp.
Restock and kill Blue Moon, whose chamber is east of the camp.
- 3
You land in the Ancient Prison.
Kill Blood Moon in the chamber to the east.
- 4
Go south to the Ancient Shrine and open the Lunar Chest, then head north to the Streambound Cavern to start again.
Eclipse only: after the kill you are placed at the Earthbound Cavern stove. Go south-east into the Streambound Cavern, run south to the Lunar Chest, then walk back north to the boss.
Drops: Eclipse Moon Armour and the Eclipse Atlatl
Eclipse Moon has no drop table of its own. Every Moon you defeat before opening the Lunar Chest gives a separate 1/56 roll at a piece of that Moon's set, so an Eclipse kill rolls for the Eclipse Moon helm, chestplate, tassets or eclipse atlatl, 1/224 each. Duplicate protection stops you getting a repeat piece until the set is complete. Kill all three Moons and the chance of at least one unique per chest is about 1/19.
| Item | Requirement | Note |
|---|---|---|
| Eclipse Moon helm, chestplate, tassets | 75 Ranged, 50 Defence | Ranged armour; degrades after 45 hours of combat |
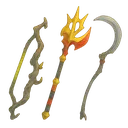
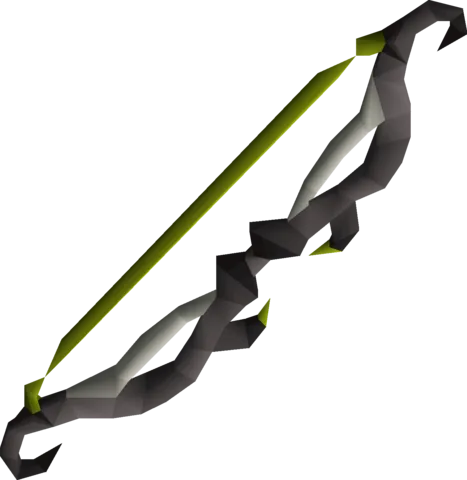
| Eclipse atlatl | 75 Ranged, 50 Attack, 50 Strength | Never degrades; max hit uses your melee strength bonus; fires atlatl darts |
| Full set effect (Eclipse) | All four pieces | Each successful atlatl hit has a 20% chance to burn for 10 damage over 24 seconds |
The armour is a ranged set even though Eclipse is a melee fight. A broken piece costs 1,500,000 coins to repair at Bob or Dunstan, or 7,500 less per Smithing level at an armour stand (757,500 at 99).
The wiki's chest table gives a 50% chance at one specific piece, such as the eclipse atlatl, after 117 chests and a 90% chance after 287. Our Lunar Chest service runs Moons of Peril kills on your account.
Combat Achievements
The Moons of Peril have 12 Combat Achievement tasks worth 33 points in total. The Eclipse-specific one is The Clone Zone (Hard): defeat the Eclipse Moon by only attacking its clones.
Shared tasks you can tick off at Eclipse include Betrayal (Hard, kill a Moon with its own weapon drop), Fortified (Hard, kill a Moon without consuming any supplies) and High Hitter (Elite, kill a Moon before its second special attack). The Combat Achievements guide covers how these fit into each tier.
Ironman Notes
Each player's kill is tracked separately, so other players' hits never count toward your Moon and ironmen get full rewards. Supplies cost nothing since they are made in the dungeon, and the Lunar Chest's standard loot suits irons well: atlatl darts, swamp tar, noted herbs, supercompost, water orbs and blessed bone shards for Prayer.
Common Mistakes
- Keeping a fast weapon on for Clones. Parries ignore attack speed, so the biggest slow hit wins.
- Turning on Protect from Melee. It does nothing against any Moon.
- Bringing a scythe as your main weapon. Its three hitsplats each lose 6 to flat armour.
- Getting caught by Searing Rays. Each hit stacks the curse and you glance more often afterwards.
- Drifting off the glyph during standard attacks. The tick damage doubles up to 16.
- Banking for food. The camps make better food and potions for free.
- Speccing with a dragon warhammer or Bandos godsword. Defence drain does not work on the Moons.
FAQ
Where is the Eclipse Moon in OSRS?
In Neypotzli, under Cam Torum in Varlamore. Enter from the north end of the city, take the north-east exit from the antechamber into the Streambound Cavern, and the boss room is at the south end of it. You need Perilous Moons done.
What is the Eclipse Moon weak to?
Stab. She has 0 stab defence against +100 slash and crush, plus 6 flat armour. Magic and ranged hit +500 defence, so stick to melee.
Does Protect from Melee work on the Eclipse Moon?
No. Protection prayers do nothing against any of the Moons' attacks. Use Piety or the stacking boost prayers instead.
How does the Eclipse Moon clone phase work?
You are bound in the centre while 15 clones attack in five waves of three. Face each clone as it spawns to parry it. Every parry hits the boss with 100% accuracy and no delay, so switch to your hardest-hitting slow weapon first.
Why do my attacks glance off the Eclipse Moon's shield?
That is her curse. Each hit she lands adds stacks, and a glancing blow loses 12 from its max hit (8 during Clones). Avoid Searing Rays damage and the stacks decay by 2 every 5 ticks.
How do I repair Eclipse Moon armour?
The helm, chestplate and tassets break after 45 hours of combat. Bob or Dunstan repair a piece for 1,500,000 coins, or you can do it at an armour stand for 7,500 less per Smithing level. The eclipse atlatl never degrades.
Is the Eclipse Moon the hardest Moon?
No. The wiki calls Blood Moon by far the hardest, because she heals whenever she damages you. Eclipse is mostly about getting the Clone parries right.
Still stuck on a mechanic? Ask the team on our Discord, it is free.
Bottom Line
Eclipse comes down to two weapons: a stab weapon for the standard attacks and the biggest slow weapon you can get for the Clone phase. Parry all 15 clones, walk the shield lap without taking rays, and she goes down quickly.
The bosses list has the full index.
Enjoyed the guide?
Drop a like — it helps other Adventurers find the good stuff.
Community
Comments
Silence in the hall…
Be the first Adventurer to leave a mark.
Join the thread
Add a comment
Tips, drops, or “this carried my account” — keep it useful.